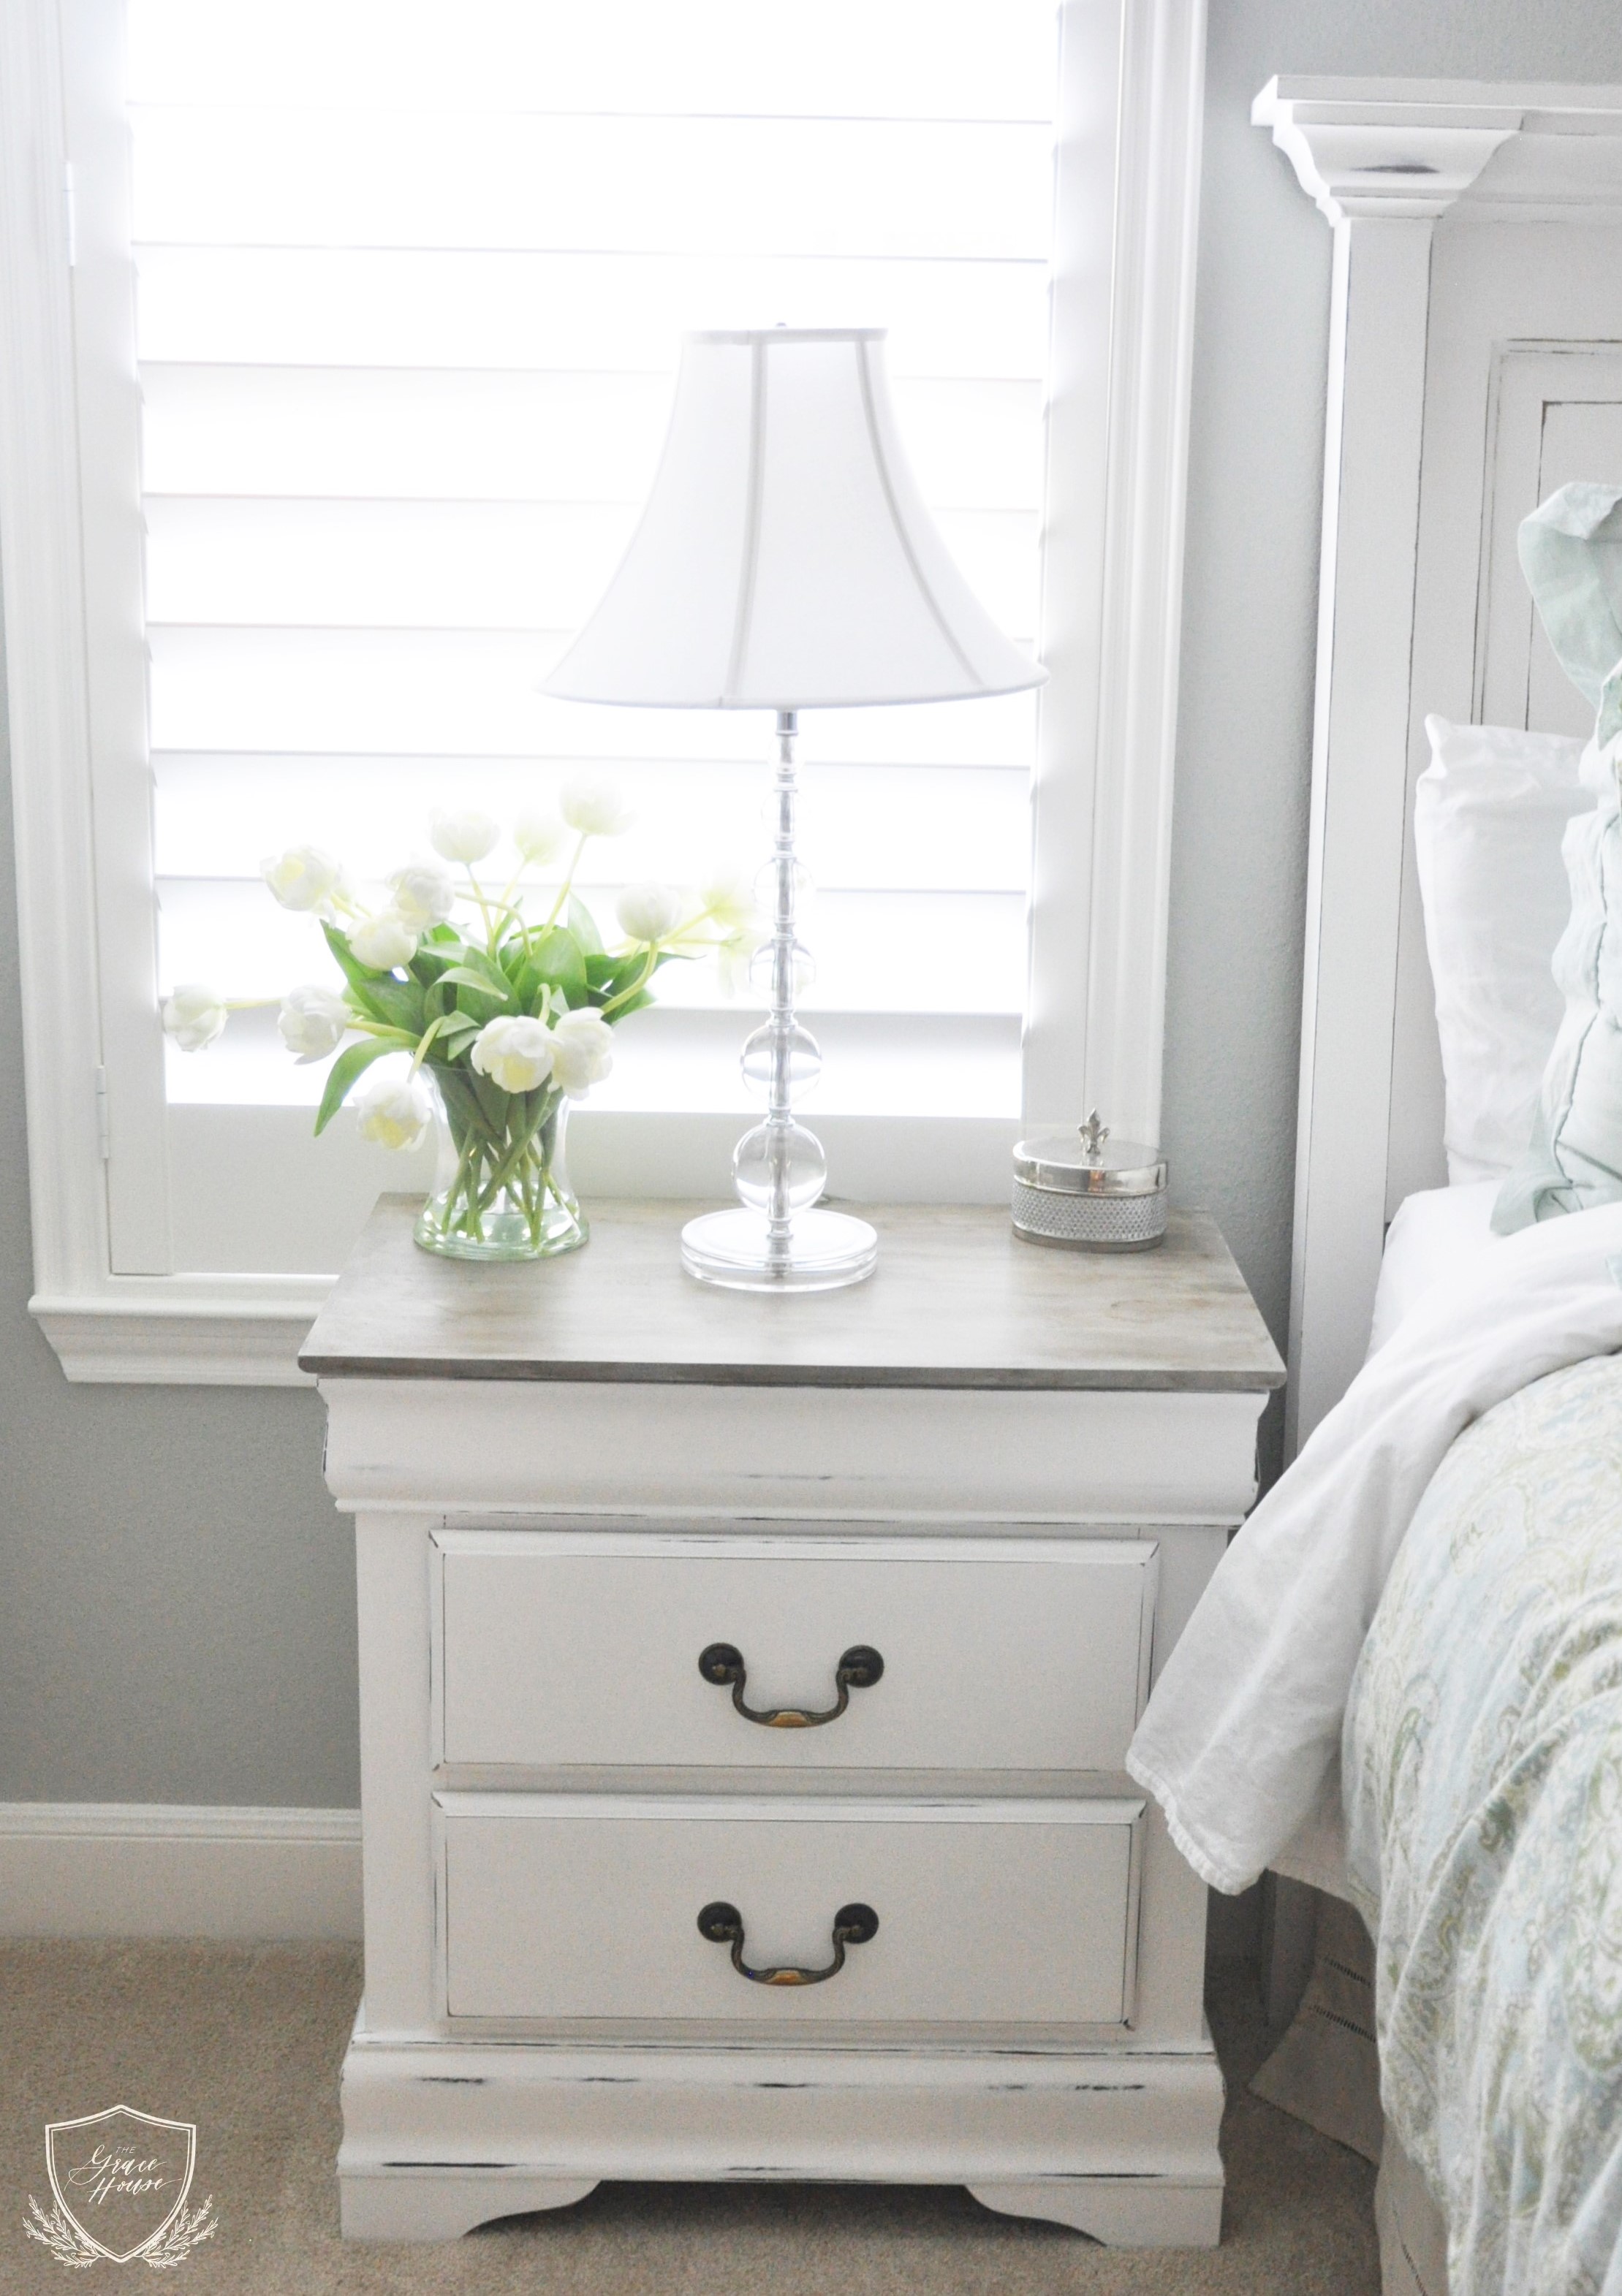
I've been sitting on the fence for a while about starting a blog. I don't know about you, but for me it's downright overwhelming and a little confusing. I actually got my page set up...kind of, then I would work on it for a while, get frustrated, and leave it for weeks before I came back to it. Well, last week I posted two little photos to my Instagram page. These particular posts were photos of a nightstand that I had refinished with chalk paint. This also happened to be my first attempt at creating a faux reclaimed wood top, and surprisingly, it came out really well! Sooo, all that to say I got a TON of comments requesting a tutorial, and it just so happened that I had a second nightstand to refinish. That, my friends, was the little push I needed to get this thing going. So, I guess I should say thank you, and as promised, here is that chalk paint tutorial. Enjoy!
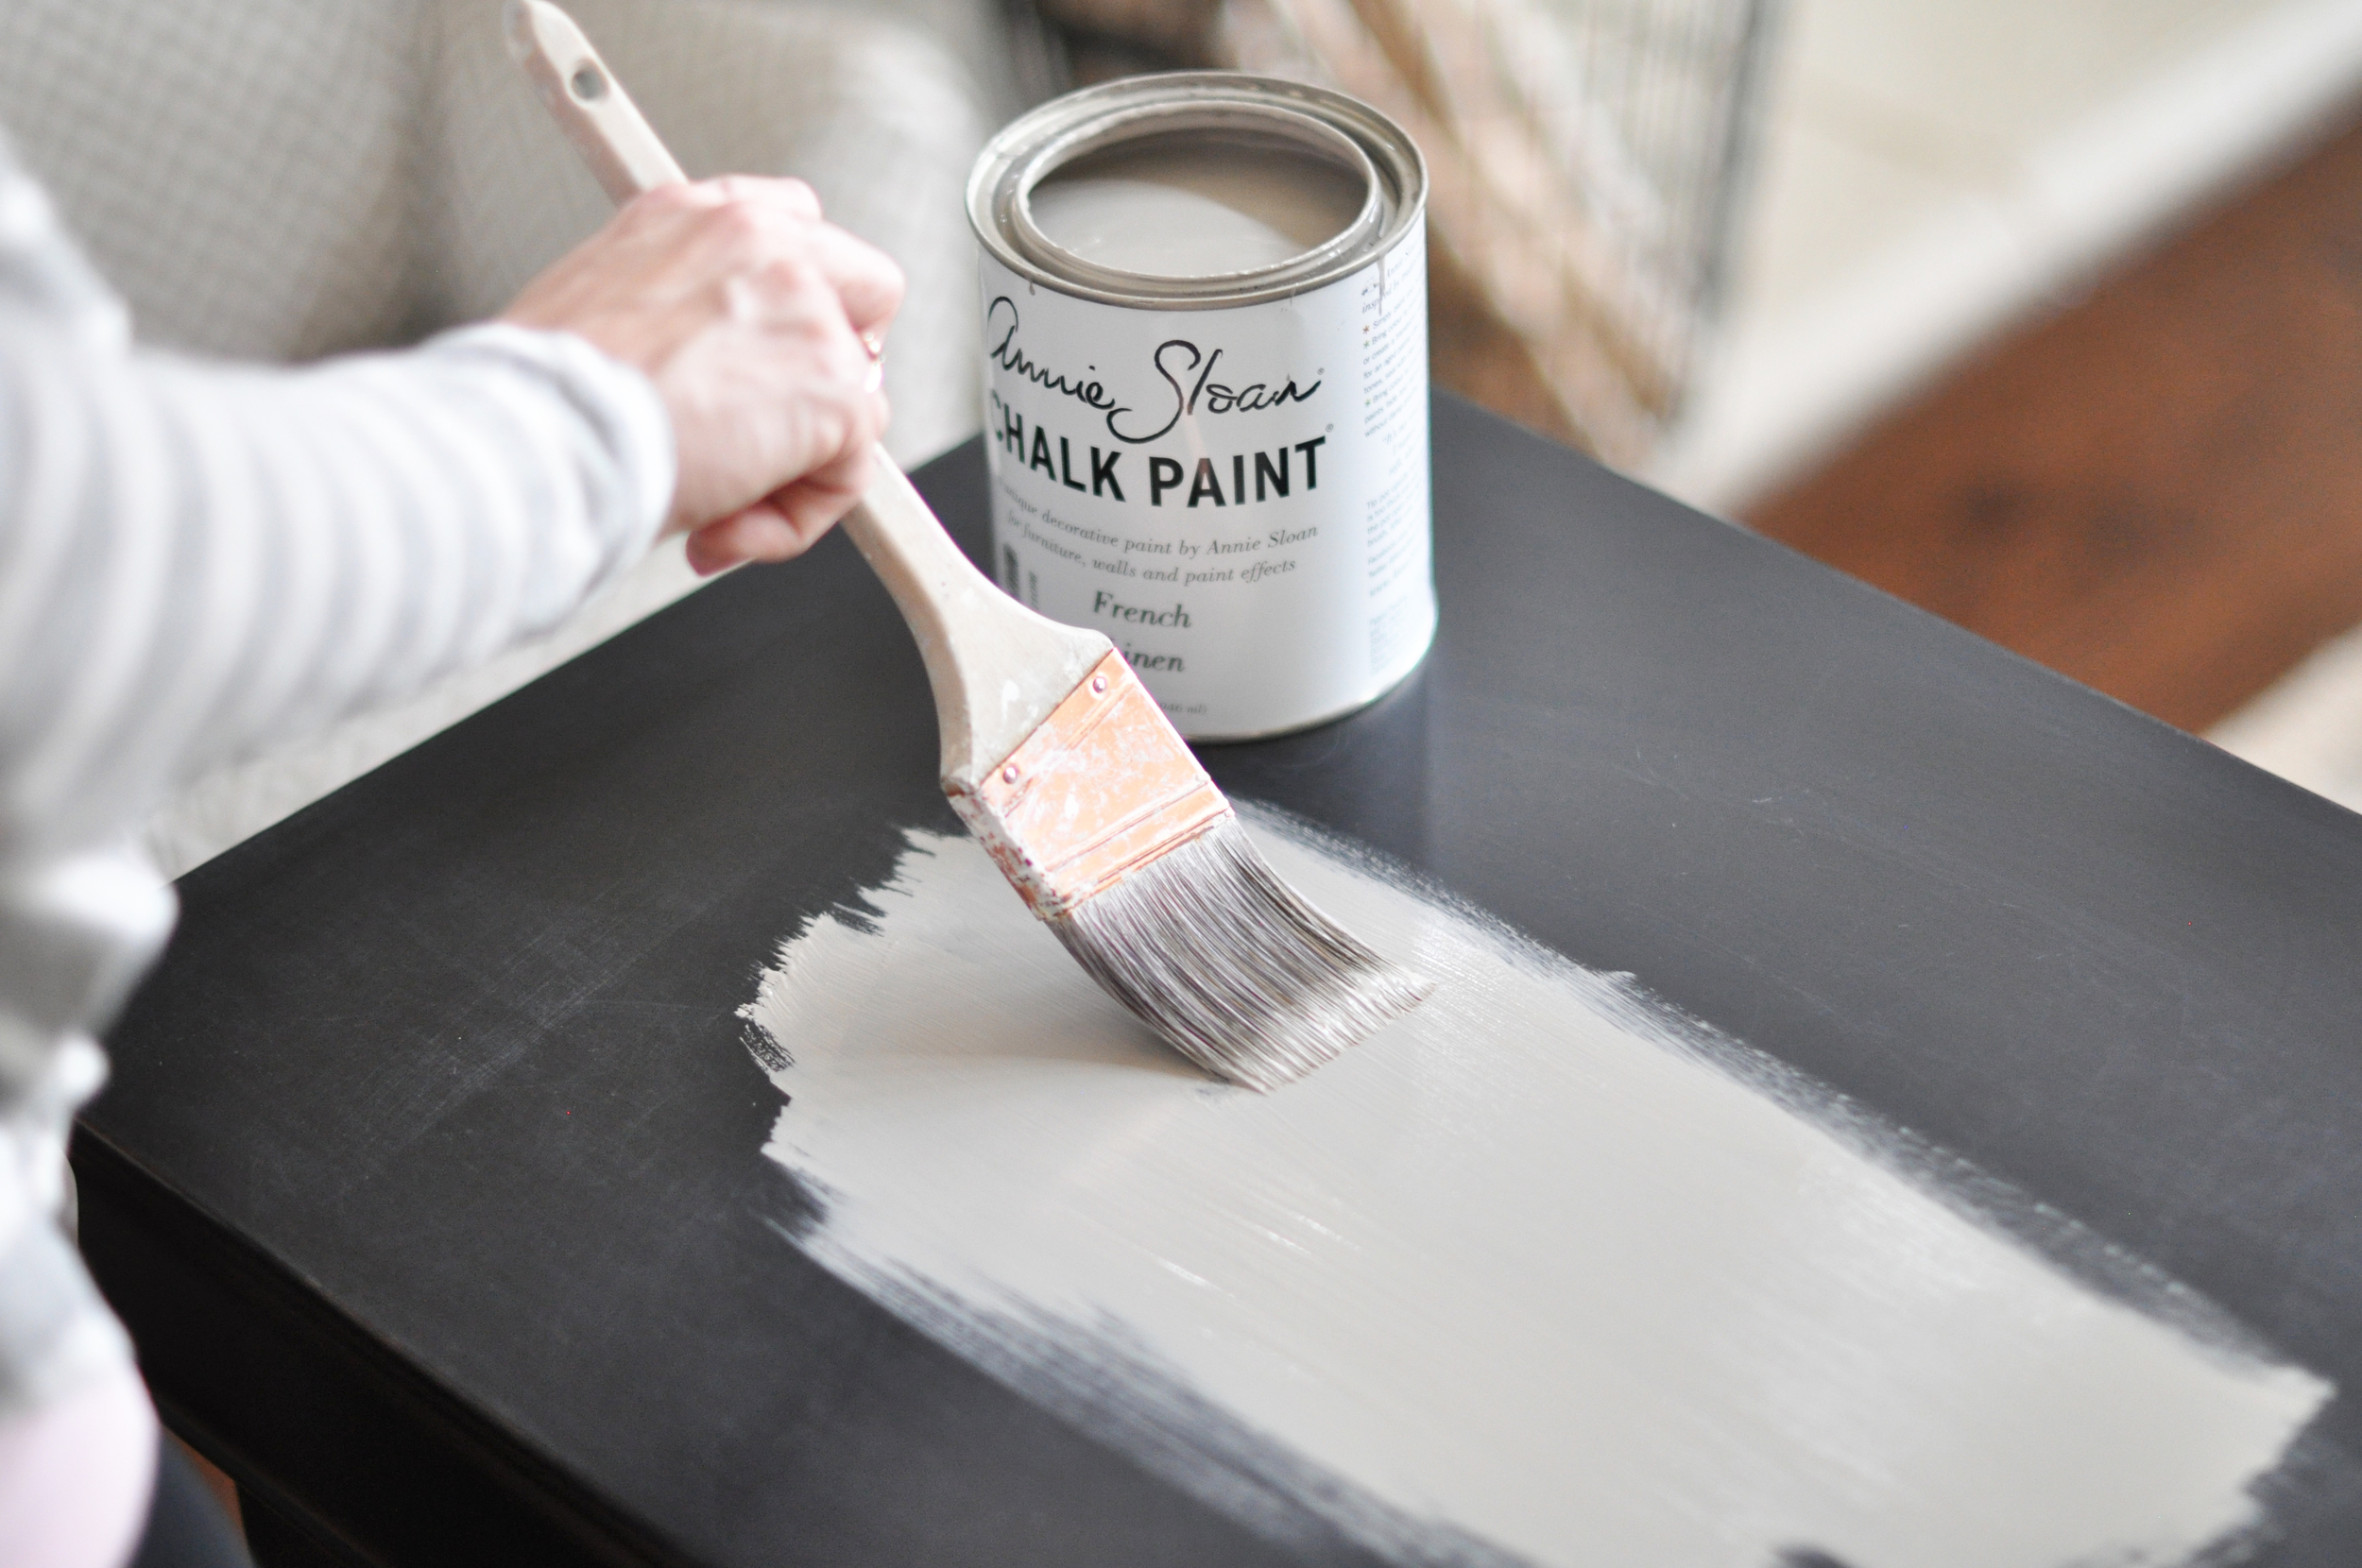
Here we go! Let's talk first about materials. Feel free to use any brand of chalk paint you like for this. My favorite just happens to be Annie Sloan, and that is what I used to refinish my nightstands. You will need the following items:
- White and gray chalk paint. With Annie Sloan products, that translates to Pure White and French Linen, respectively.
- Clear and dark waxes
- A fine sandpaper block
- A soft bristle paint brush
- A wax brush (*Just a note about wax brushes, if you're going out and purchasing one, you will want to soak it in water overnight to remove any loose bristles before you use it. Getting those stray bristles stuck in you wax is no bueno!)
- Clean, white cotton cloths for blending and buffing. A couple of your husband's old t-shirts would work perfectly for this :).
- A paper plate and plastic spoon (Not pictured)

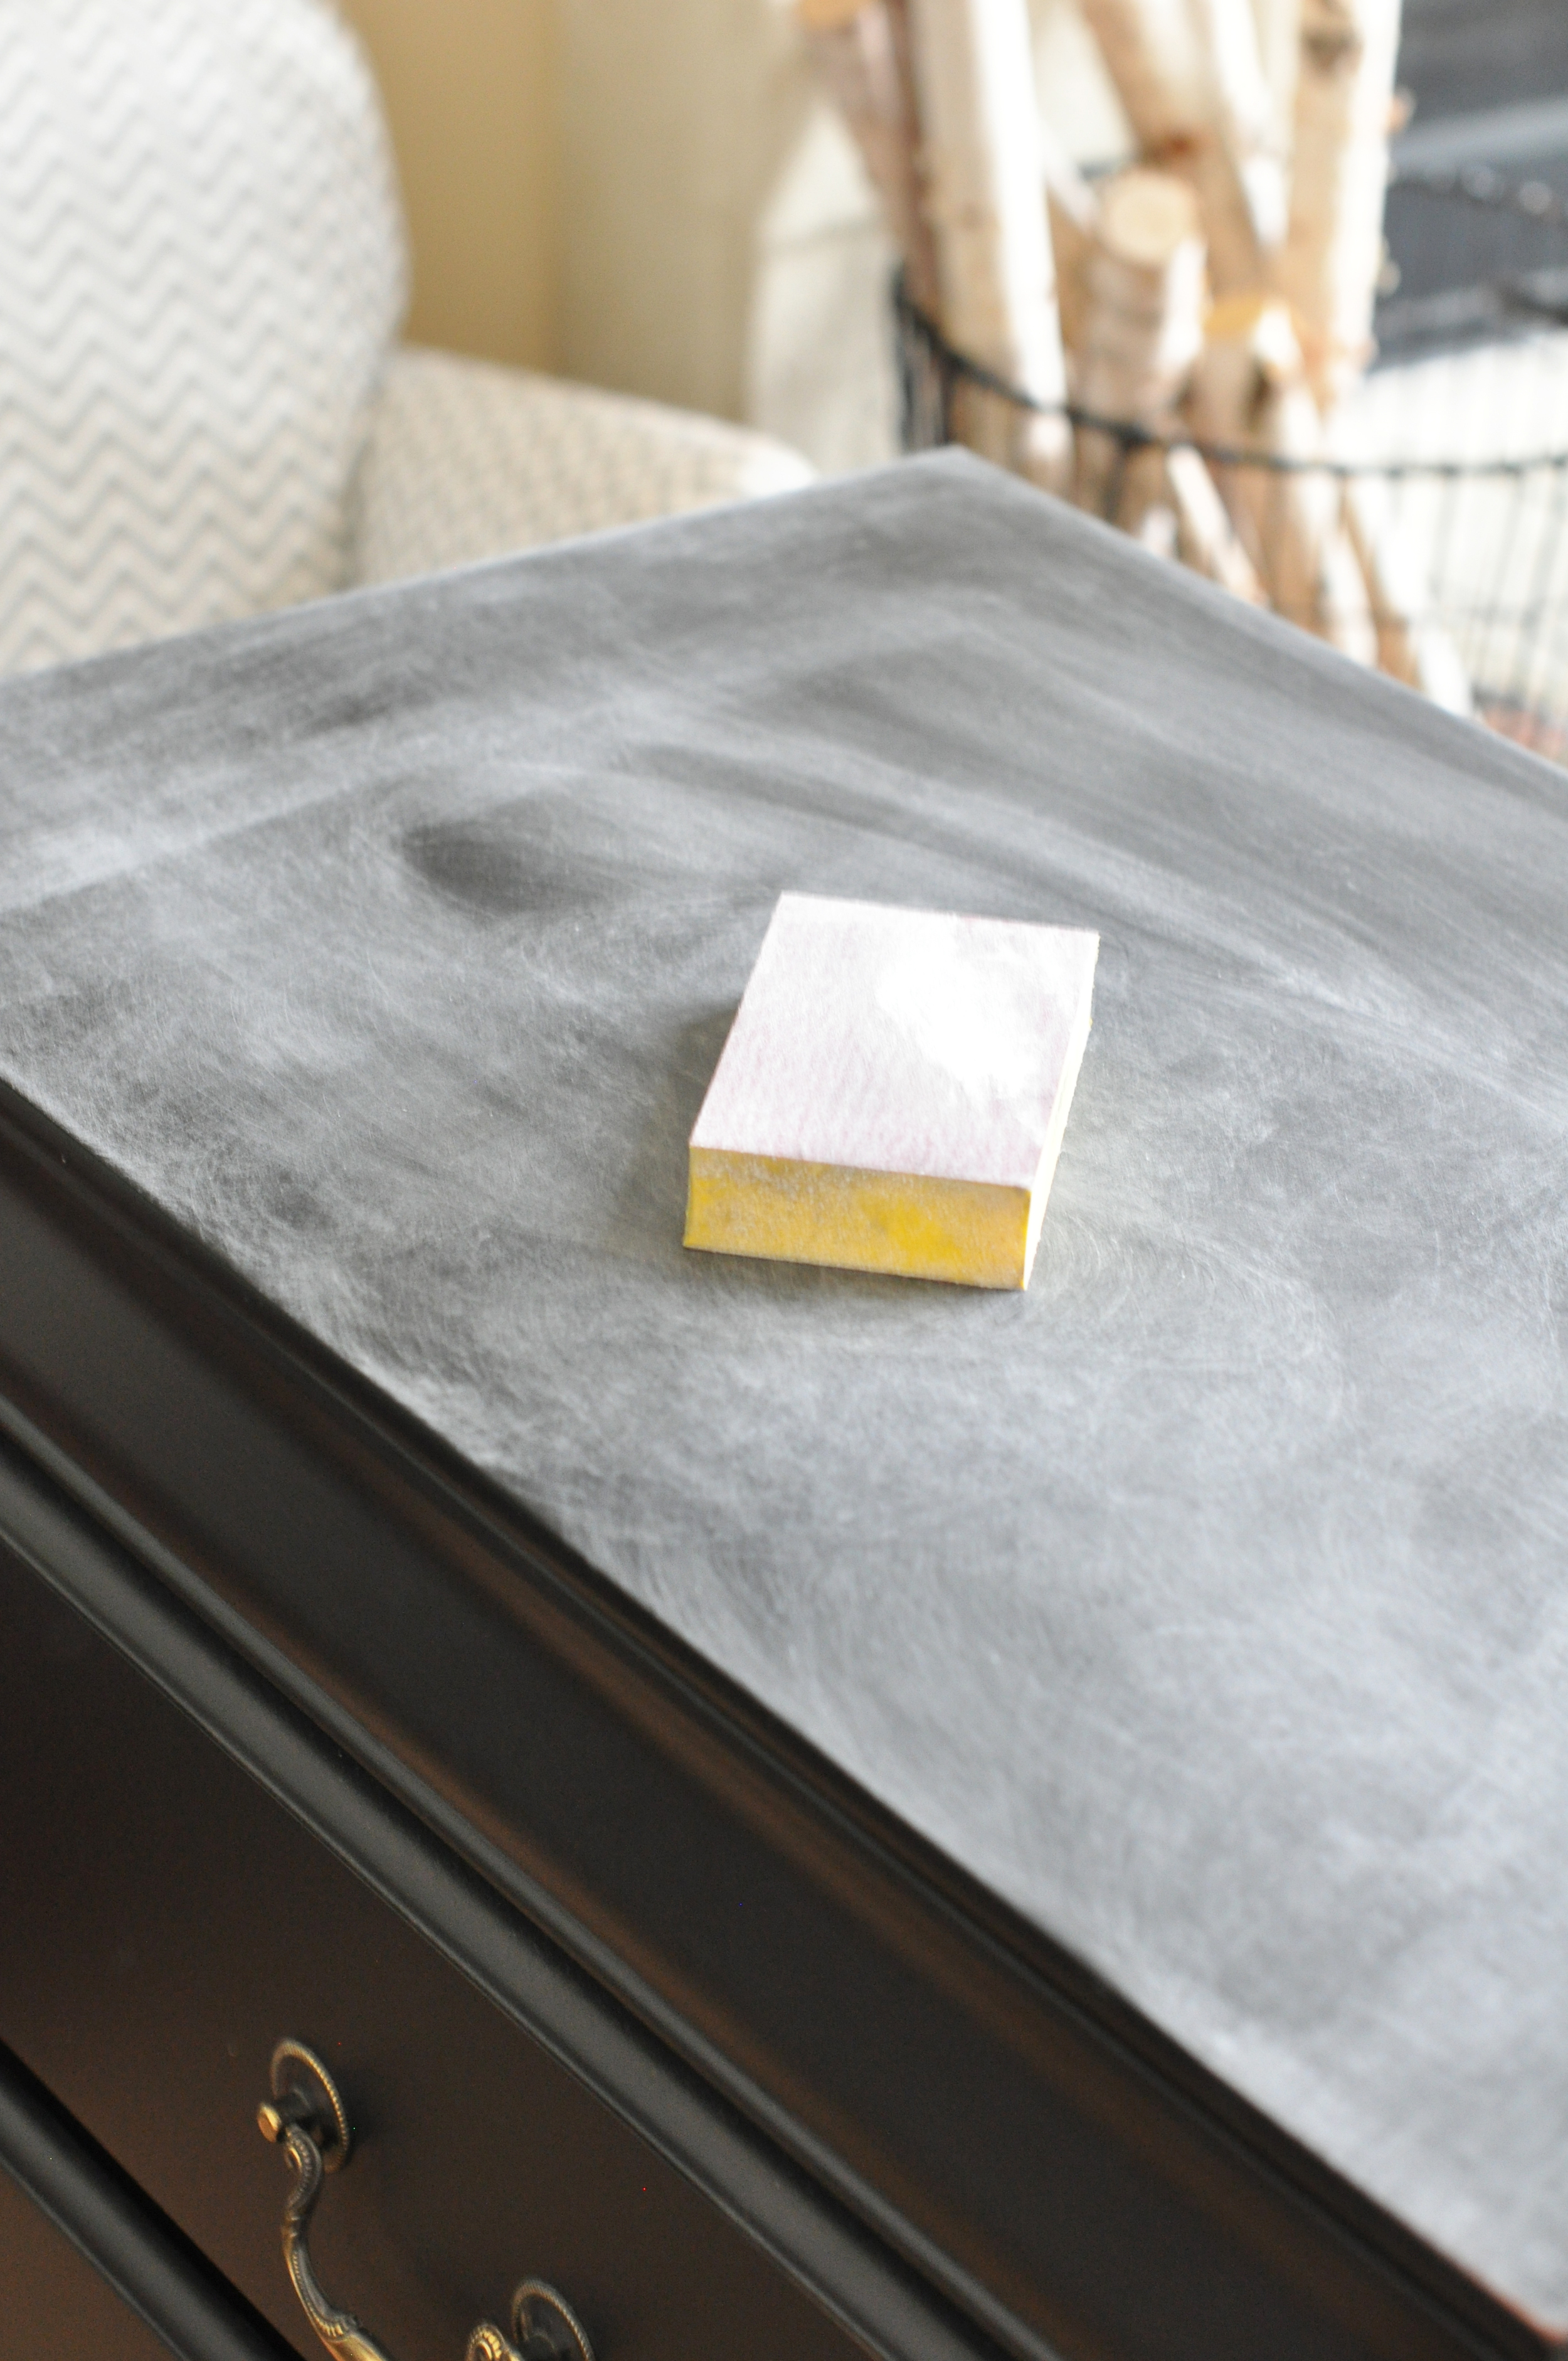
The very first thing I do before I start chalk painting is a little bit of sanding. You actually aren't supposed to have to sand most items if you're using chalk paint. For me though, I just feel better if I give the piece I'm working on a quick, light sanding just to give it a little grit. If you do choose to sand, be sure you wipe down your piece after you are finished to remove any dust.
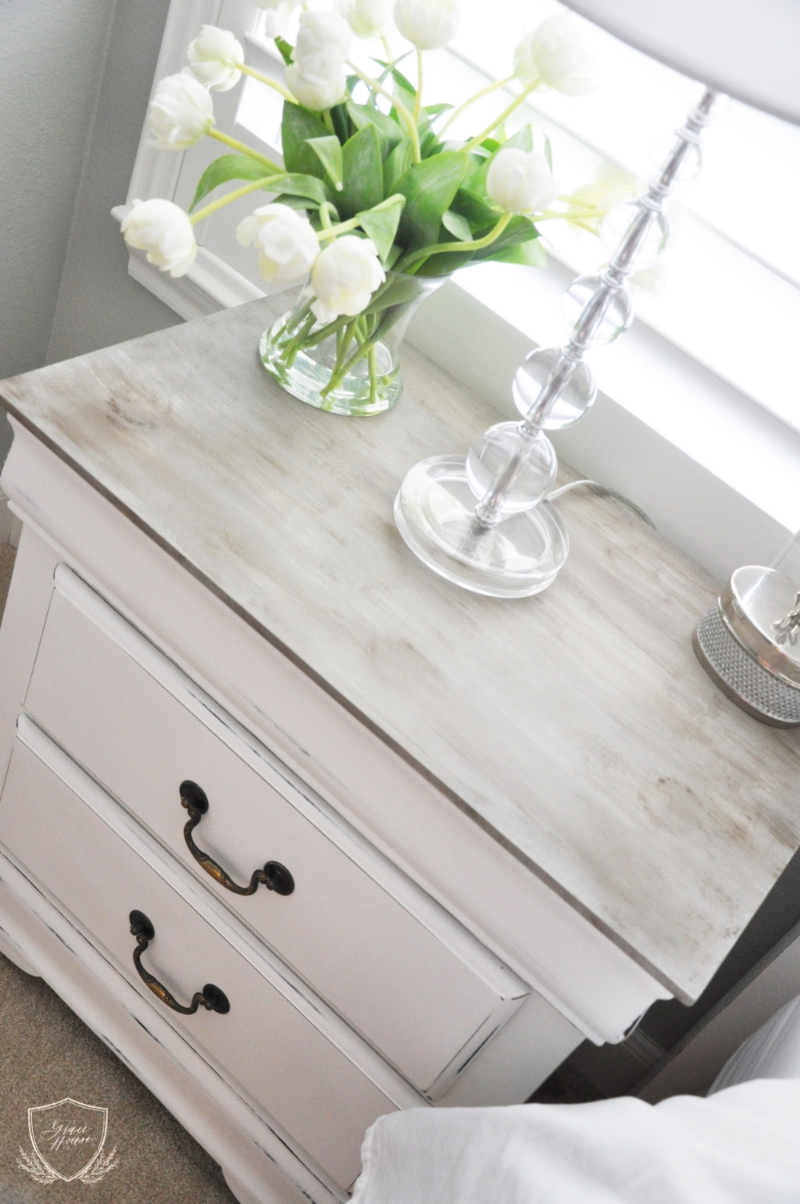
After you've sanded and cleaned your piece, you're going to start with the gray chalk paint. This is the French Linen if you're using Annie Sloan Products. Give the entire top of your piece a nice coat of gray paint, and don't forget the edges! As long as the color you're painting over is a neutral, it's okay if it's not completely covered in this case. Variation is a good thing here.
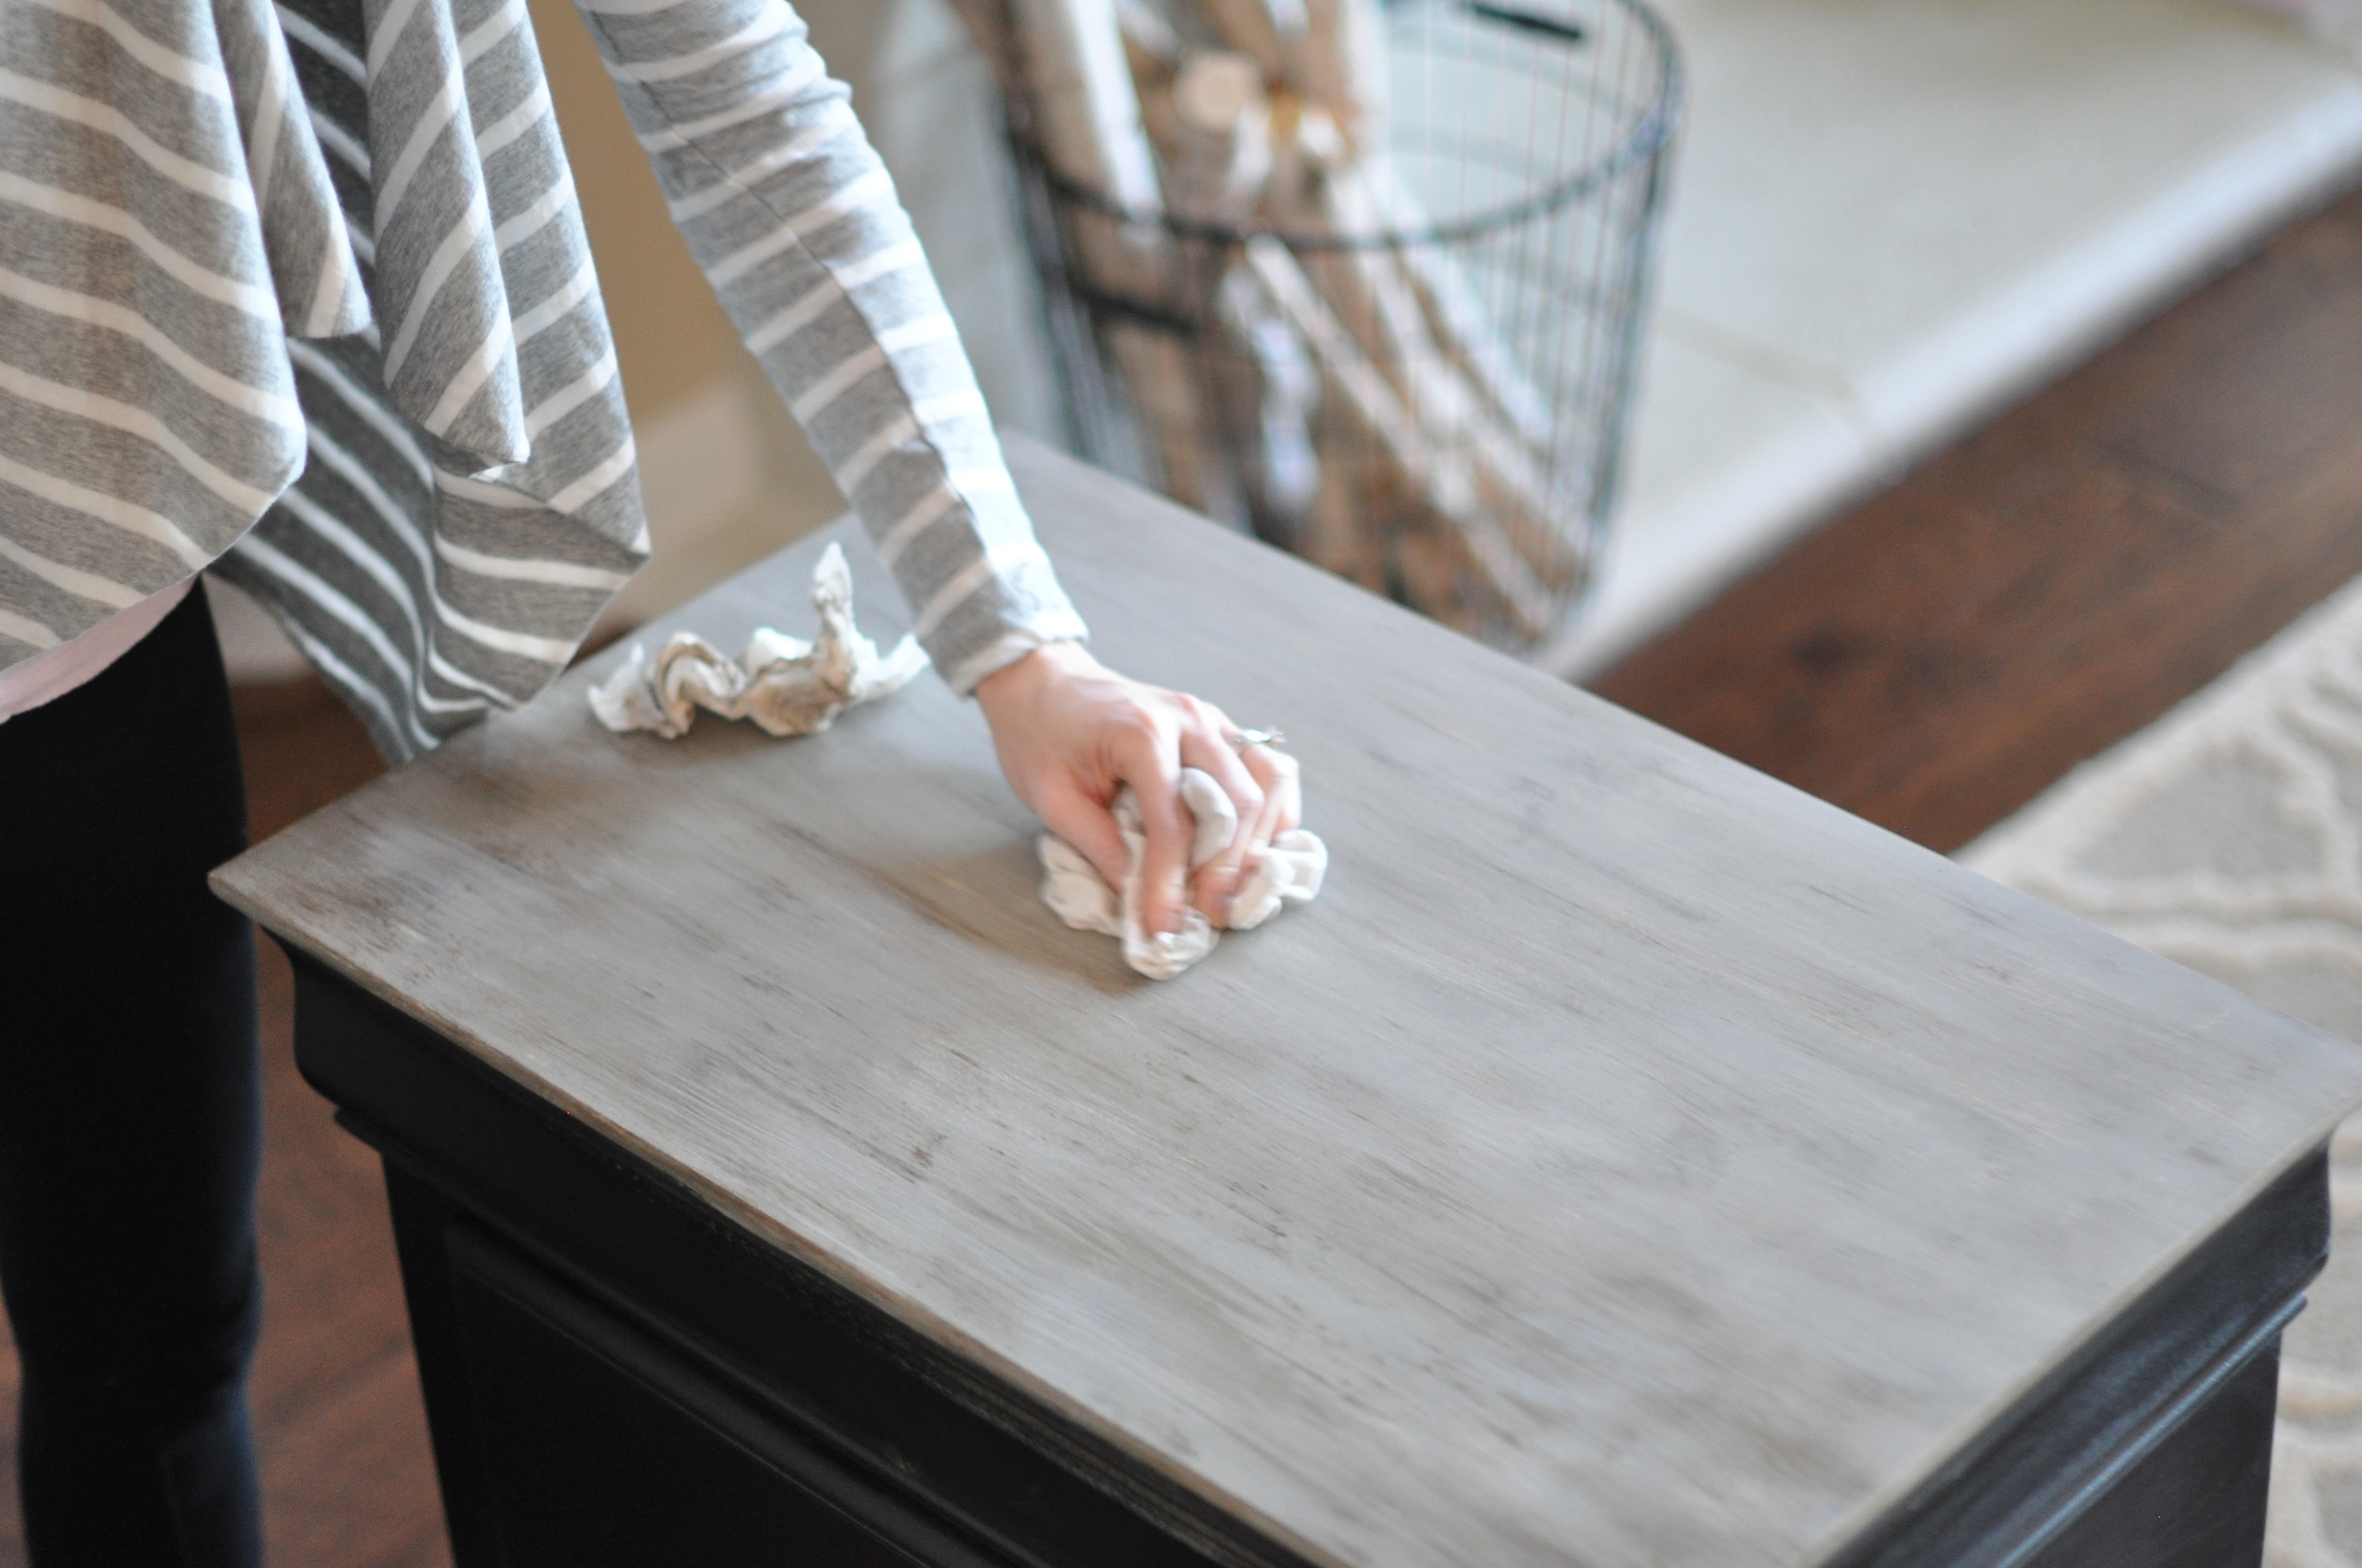
After you've given your piece a good coat of gray chalk paint, and while it's still a little wet, it's time for the white chalk paint. You're just going to dip the tip of your paint brush in the white paint, and give it a little wipe to remove any excess paint. Next lightly dry brush the white paint over the gray, working lengthwise and varying your brush strokes between long and short, light and a bit heavier. Since the goal is to make this look like reclaimed wood, we don't want a lot of uniformity going on. If you happen to end up with places where the white is too thick, either wipe it gently with a damp cloth, or wait until it dries then dry brush some more of the gray paint over it. There's nothing wrong with building your paint to get the look that you want.

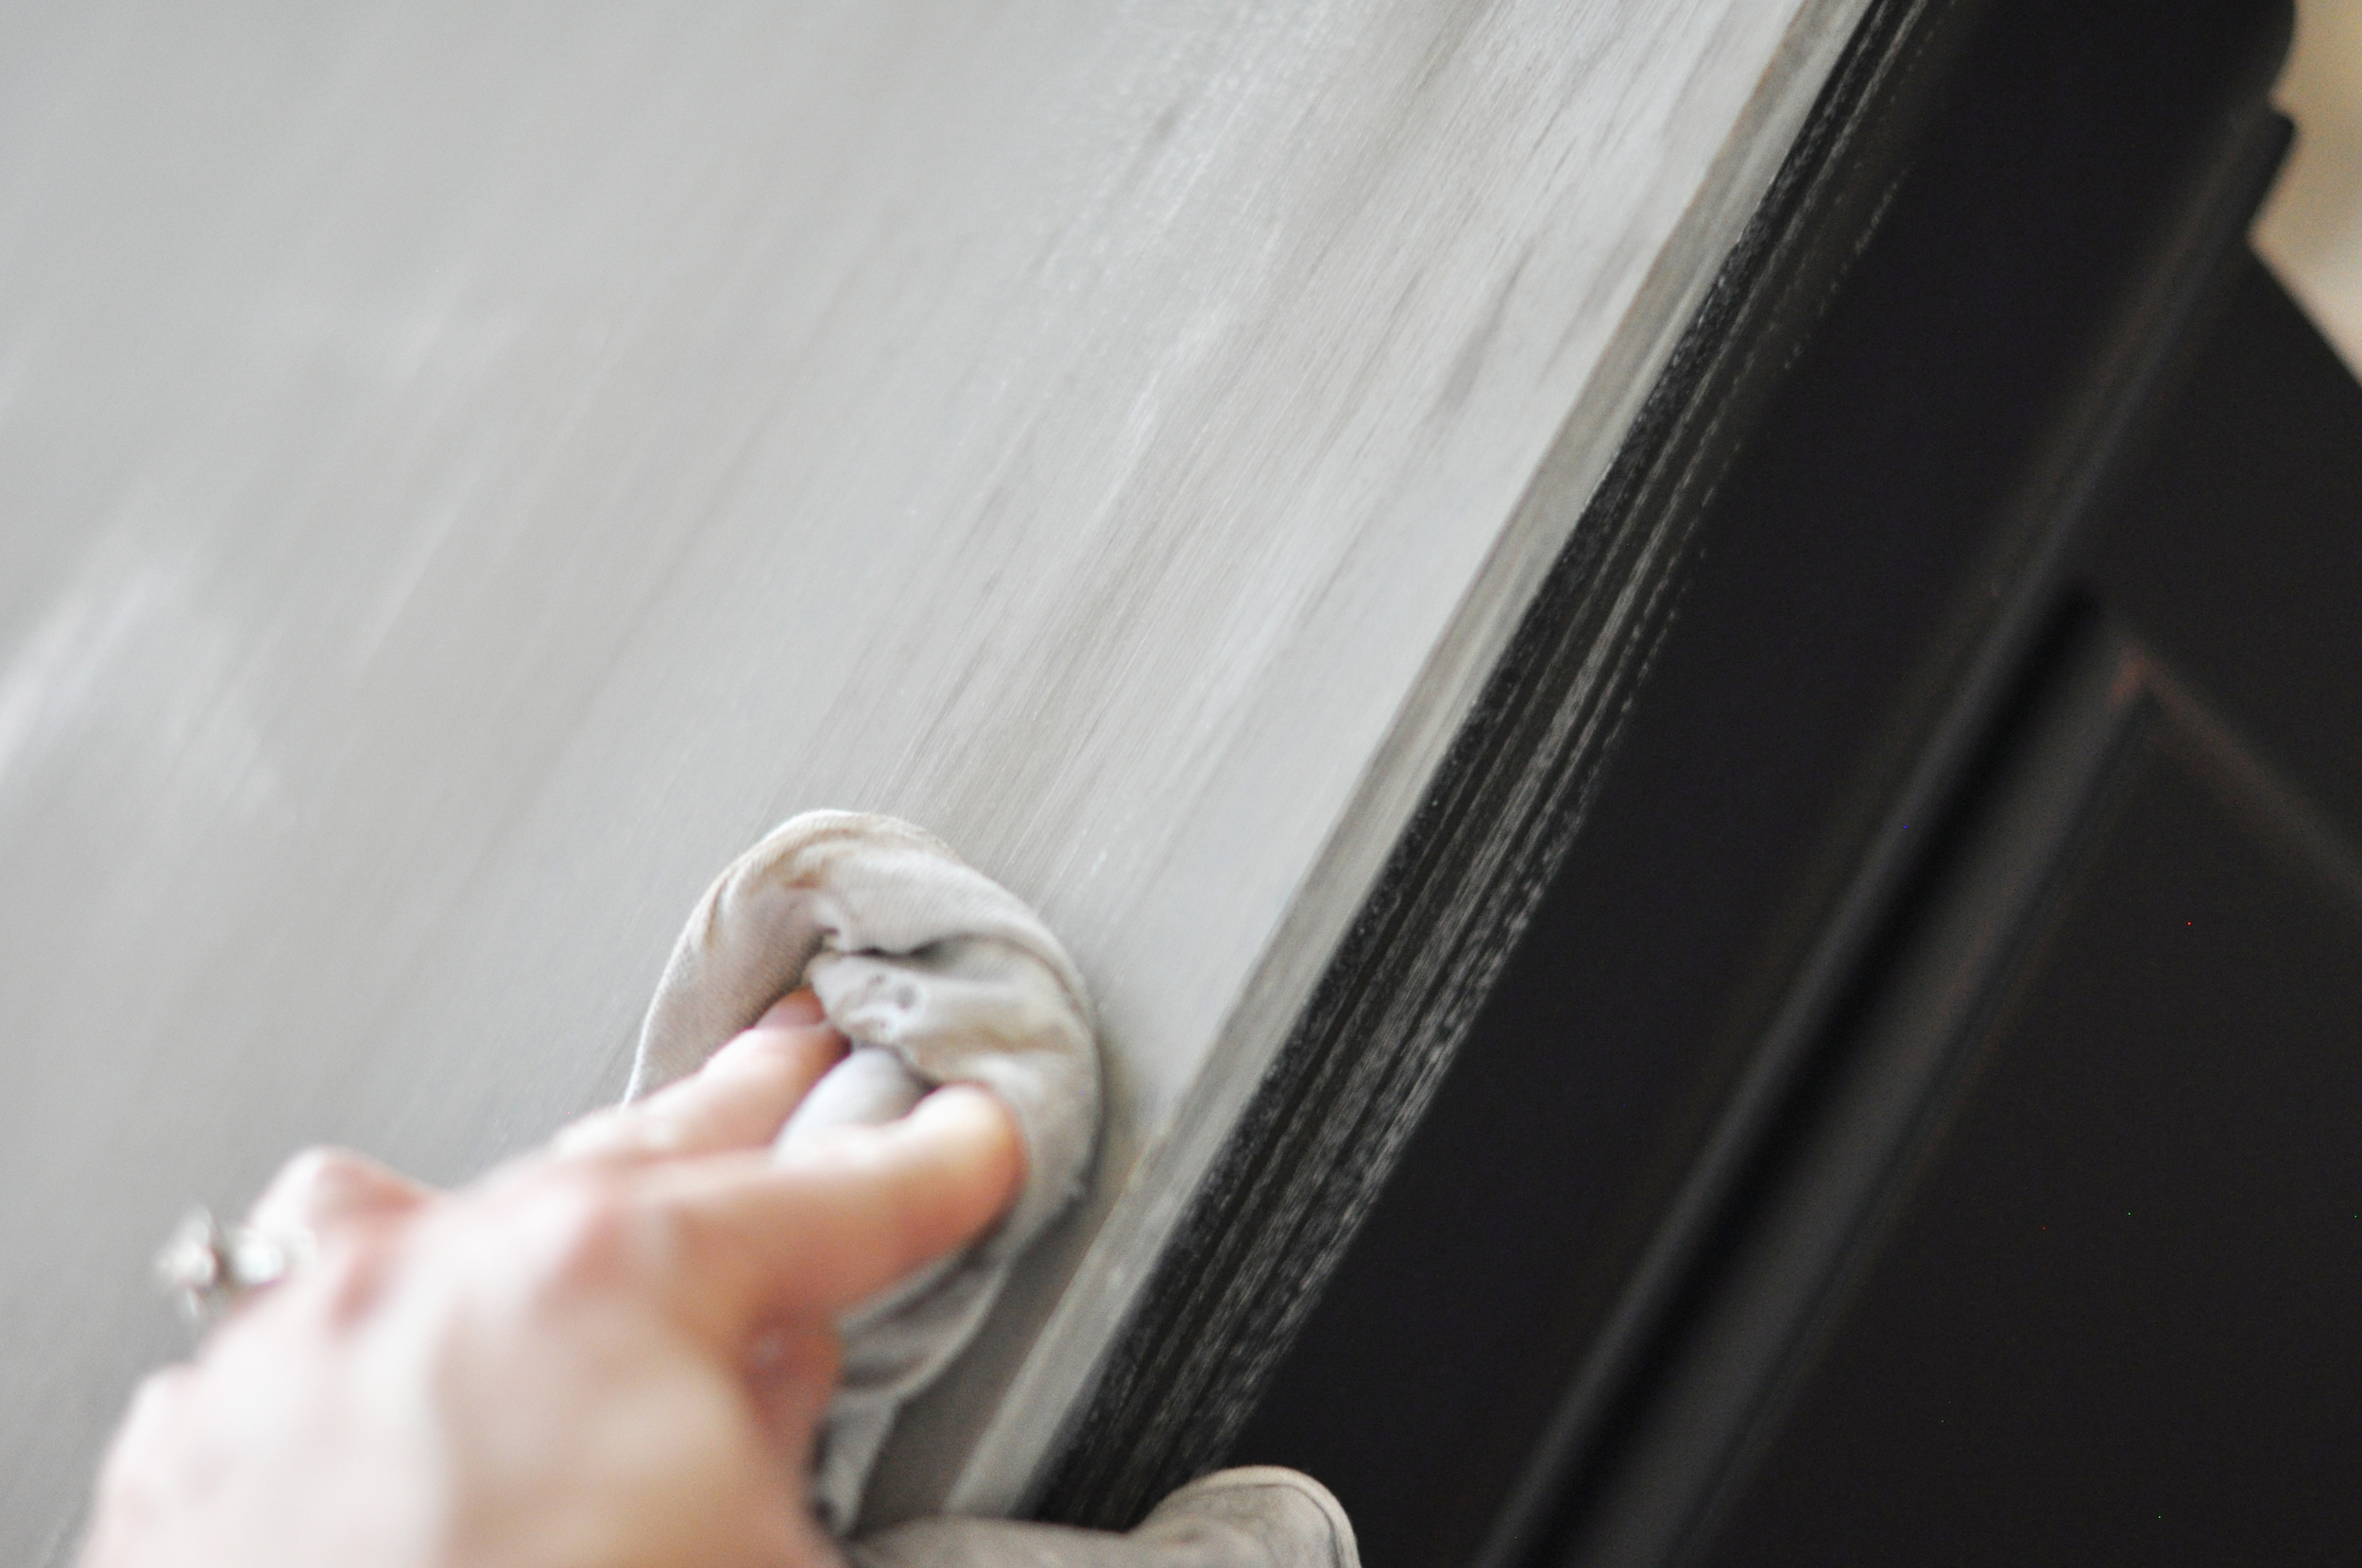
After you have the white and gray paint applied the way you want it, let it dry completely, then it's time for the dark wax. For this, you're going to lightly dip your wax brush in the wax. You only want the wax on the very tip of your bristles. Depending on how dark you want the wax, you may even wipe it across a piece of cardboard or paper to remove any excess. Lightly drag your brush lengthwise across the surface of your piece, working from edge to edge. As with the paint, variation is good. You can apply the wax a bit heavier in some spots and lighter in others. Also, if you want to add "knots" to your finish, simply dip the edge of your wax brush in the wax and dab it in several random spots across the top of your piece, then blend it with your cloth. Remember, we aren't going for uniformity here. This is what is really going to give you that look of texture and dimension.


Next, if you want to tone down the streaks of dark wax a little, you can take one of your cloths and go over it to blend the wax into the paint. If you do happen to get the wax a little thicker or streakier than you like and you can't quite tone it down by doing a little buffing, then it's okay to dry brush a little more of your gray paint over it to tone it down. You can see me doing that in the second photo below. I got a little more dark wax than I wanted, so I simply went over it with my gray paint then used my cloth to blend and remove the excess.

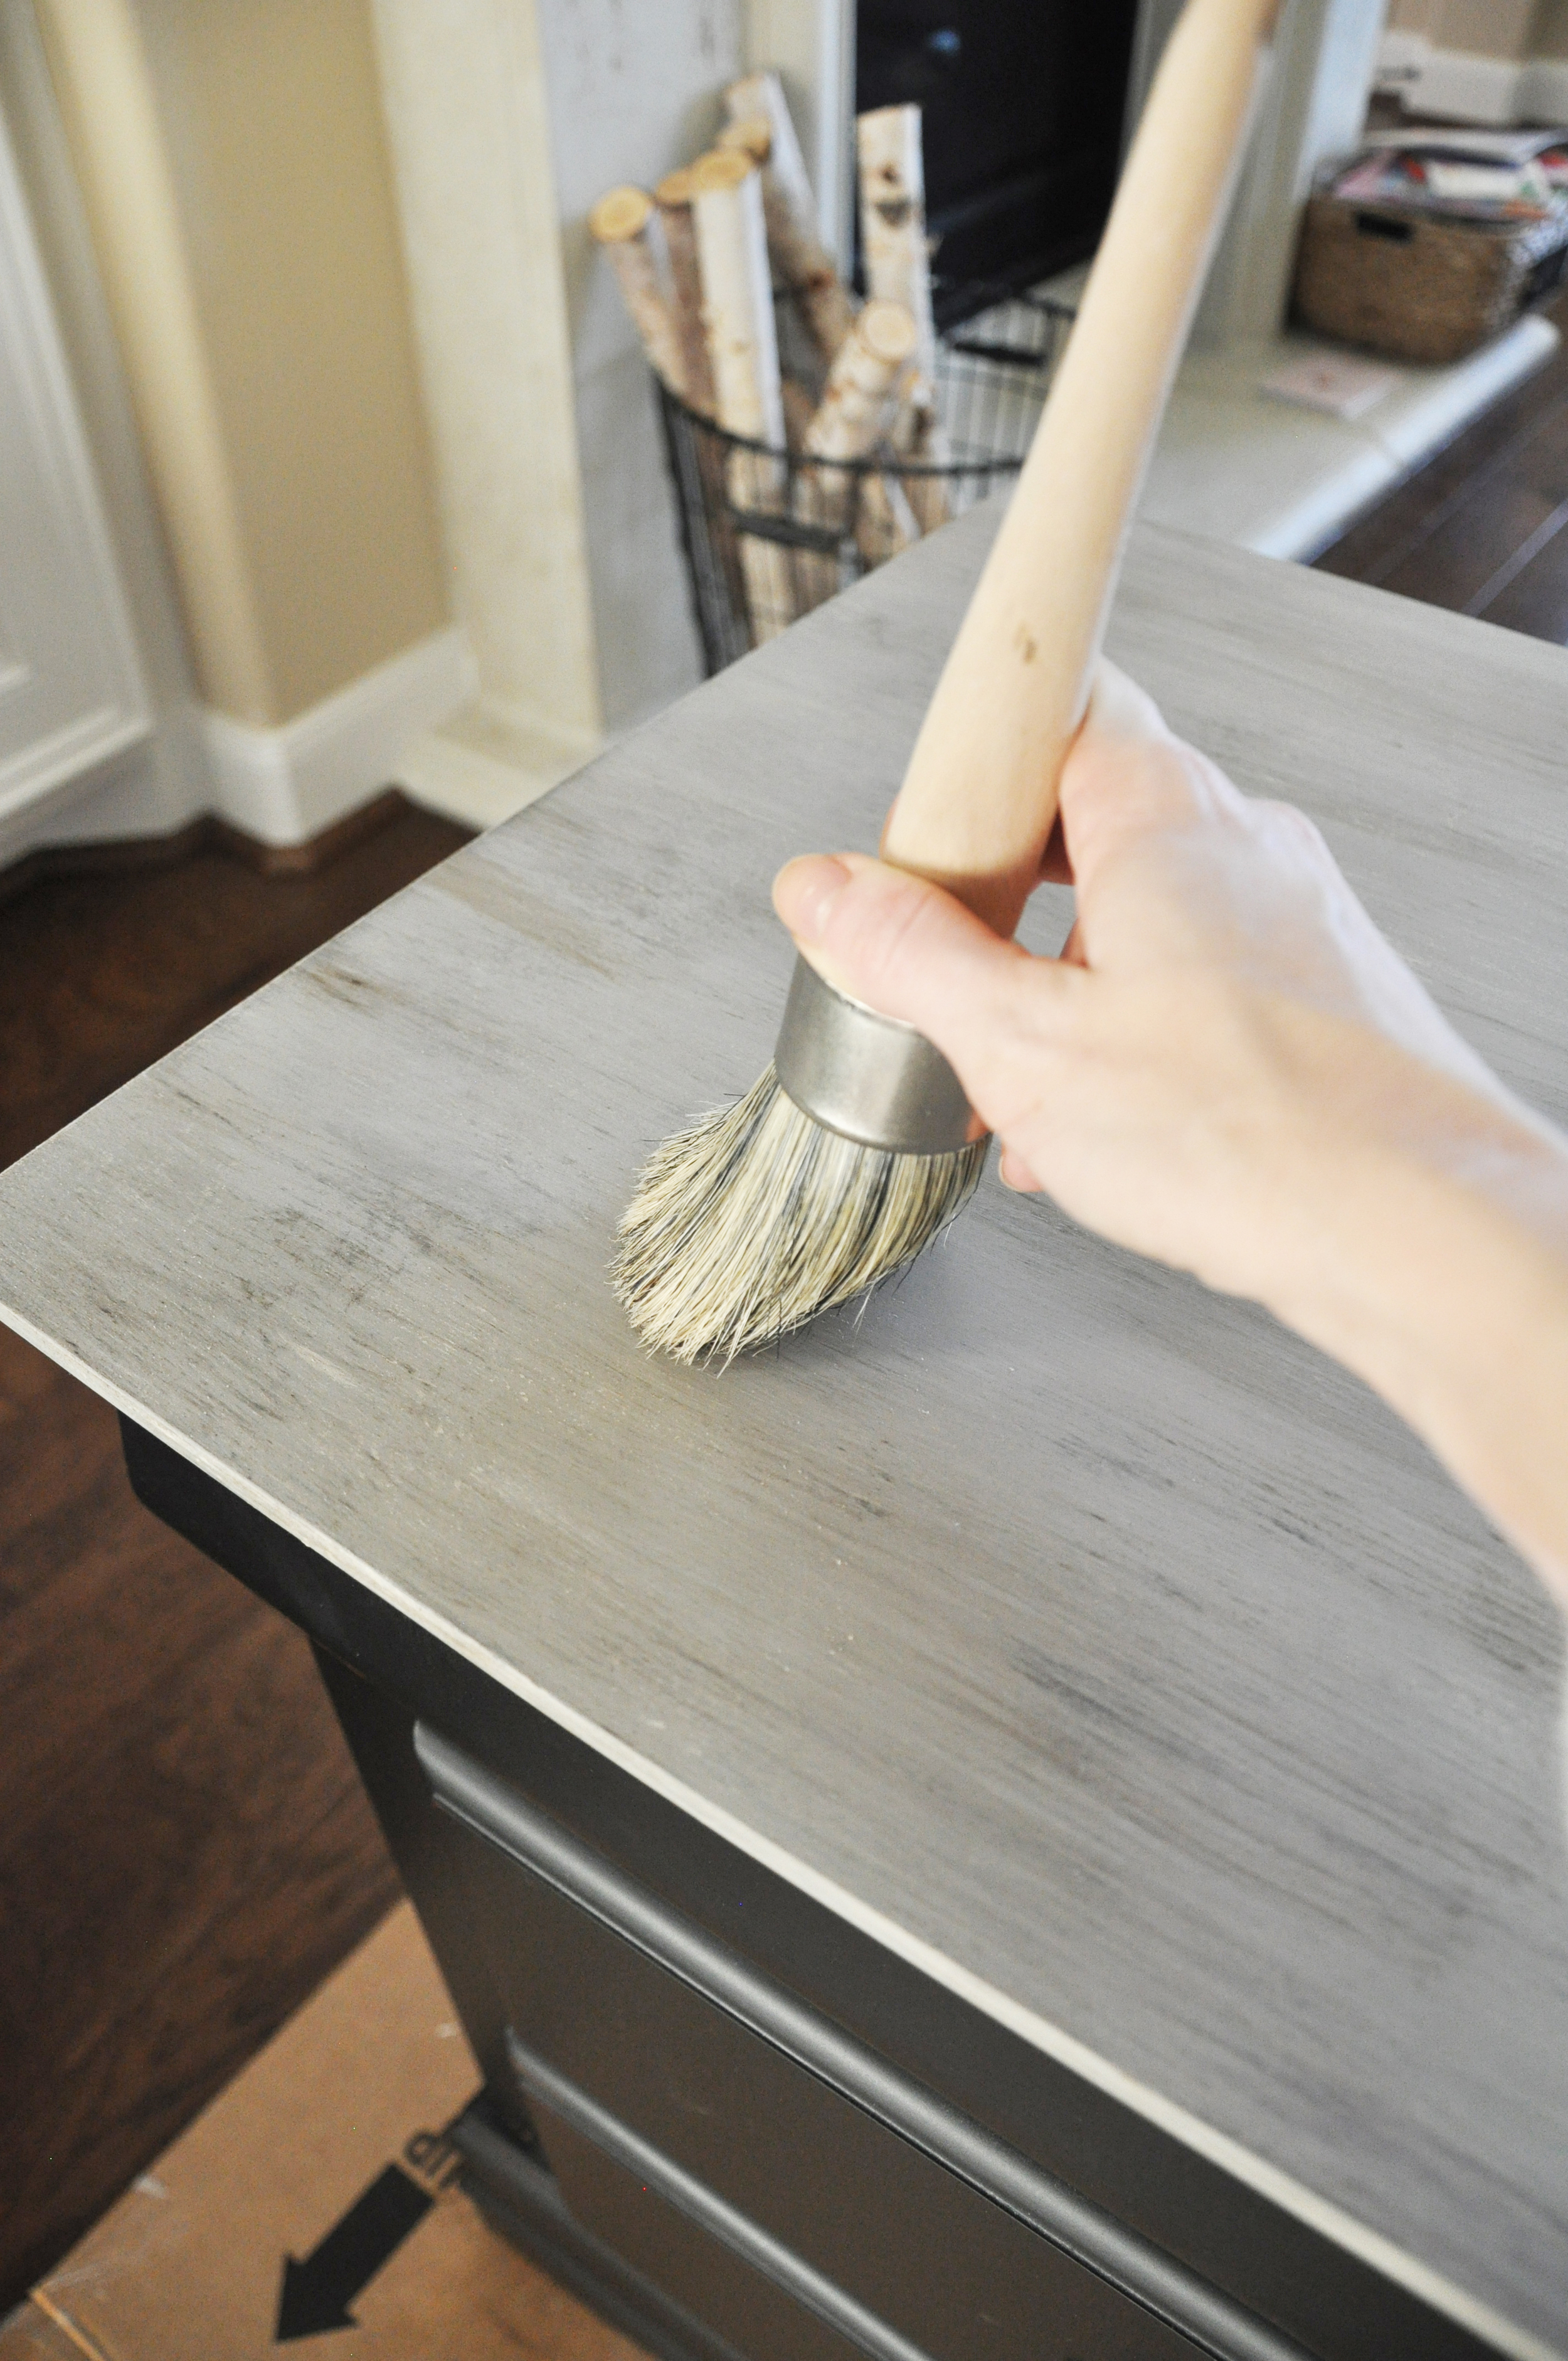
Once you're satisfied with how your finish looks, give it time to dry completely, then it's time for the clear wax. If you're going to be using the same brush for your clear wax that you used for your dark wax, then I would recommend cleaning it and letting it dry overnight. The most important thing to remember when it comes to clear wax is that a little goes a long way. I like to take a plastic spoon and a paper plate and use the back of the spoon to smear the wax across the plate. I then dip my wax brush in the wax and use the clean part of the paper plate to wipe off the excess.

Apply the clear wax to your piece in a circular motion, and feel over the sections with your hand as you go to make sure you're not missing any spots. I find that the Annie Sloan clear wax can appear uneven on the first coat, so I always apply two thin coats, letting it cure overnight in between my applications. After you've covered your piece with your first coat of thin wax, take your clean, white cloth and buff in a circular motion, regularly moving to clean sections of your cloth as you go. Buff the piece again after 24 hours, if needed, to get the sheen that you like and to remove any tackiness.
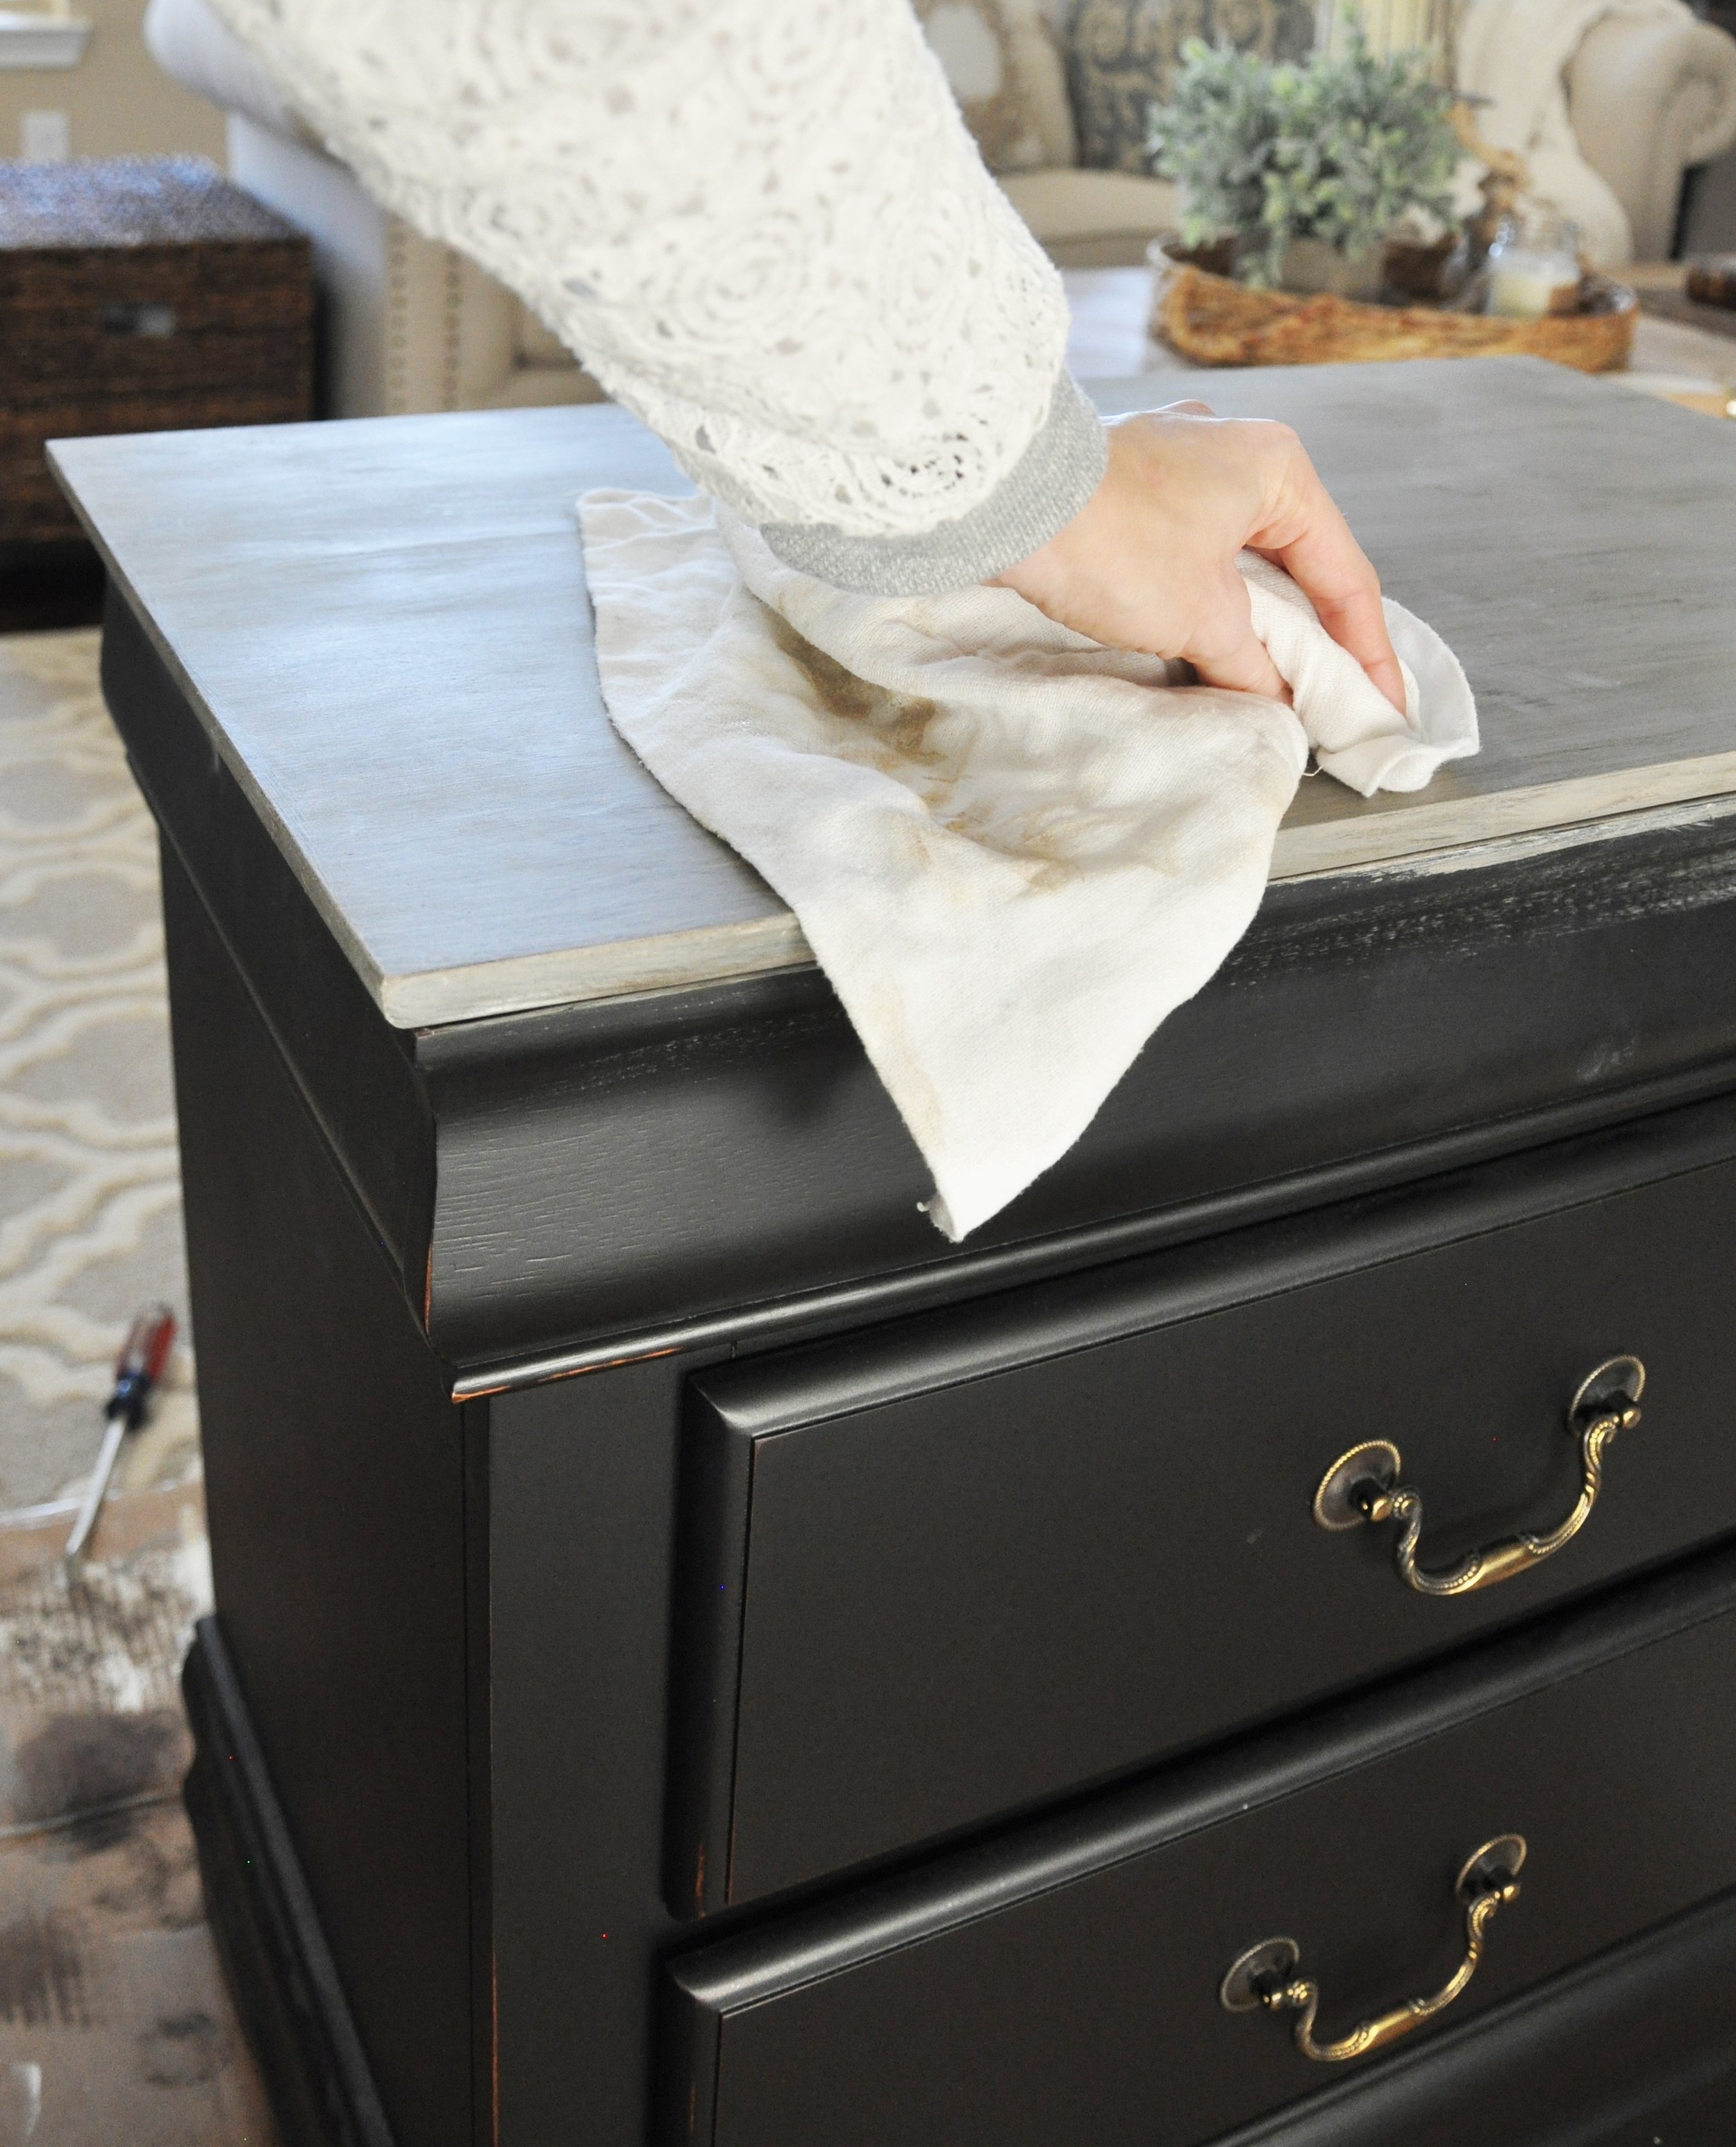
Annnd voila! You're finished with your top. Now it's time to move onto chalk painting the rest of your piece. This is much less labor intensive than the top. You're going to start by removing any hardware, then give the rest of your piece a light sanding, if you prefer, and use a clean, damp cloth to remove any dust. You can remove the drawers, if you like, but I think it's easier to paint them if they're left in place. For the base of my nightstands, I used Annie Sloan Pure White. I always give my pieces at least two coats of paint, but in this case I needed three since I was going from a black finish to white. You can see in the photo below that one coat wasn't going to cut it in this case. Make sure that you let your paint dry completely in between coats.

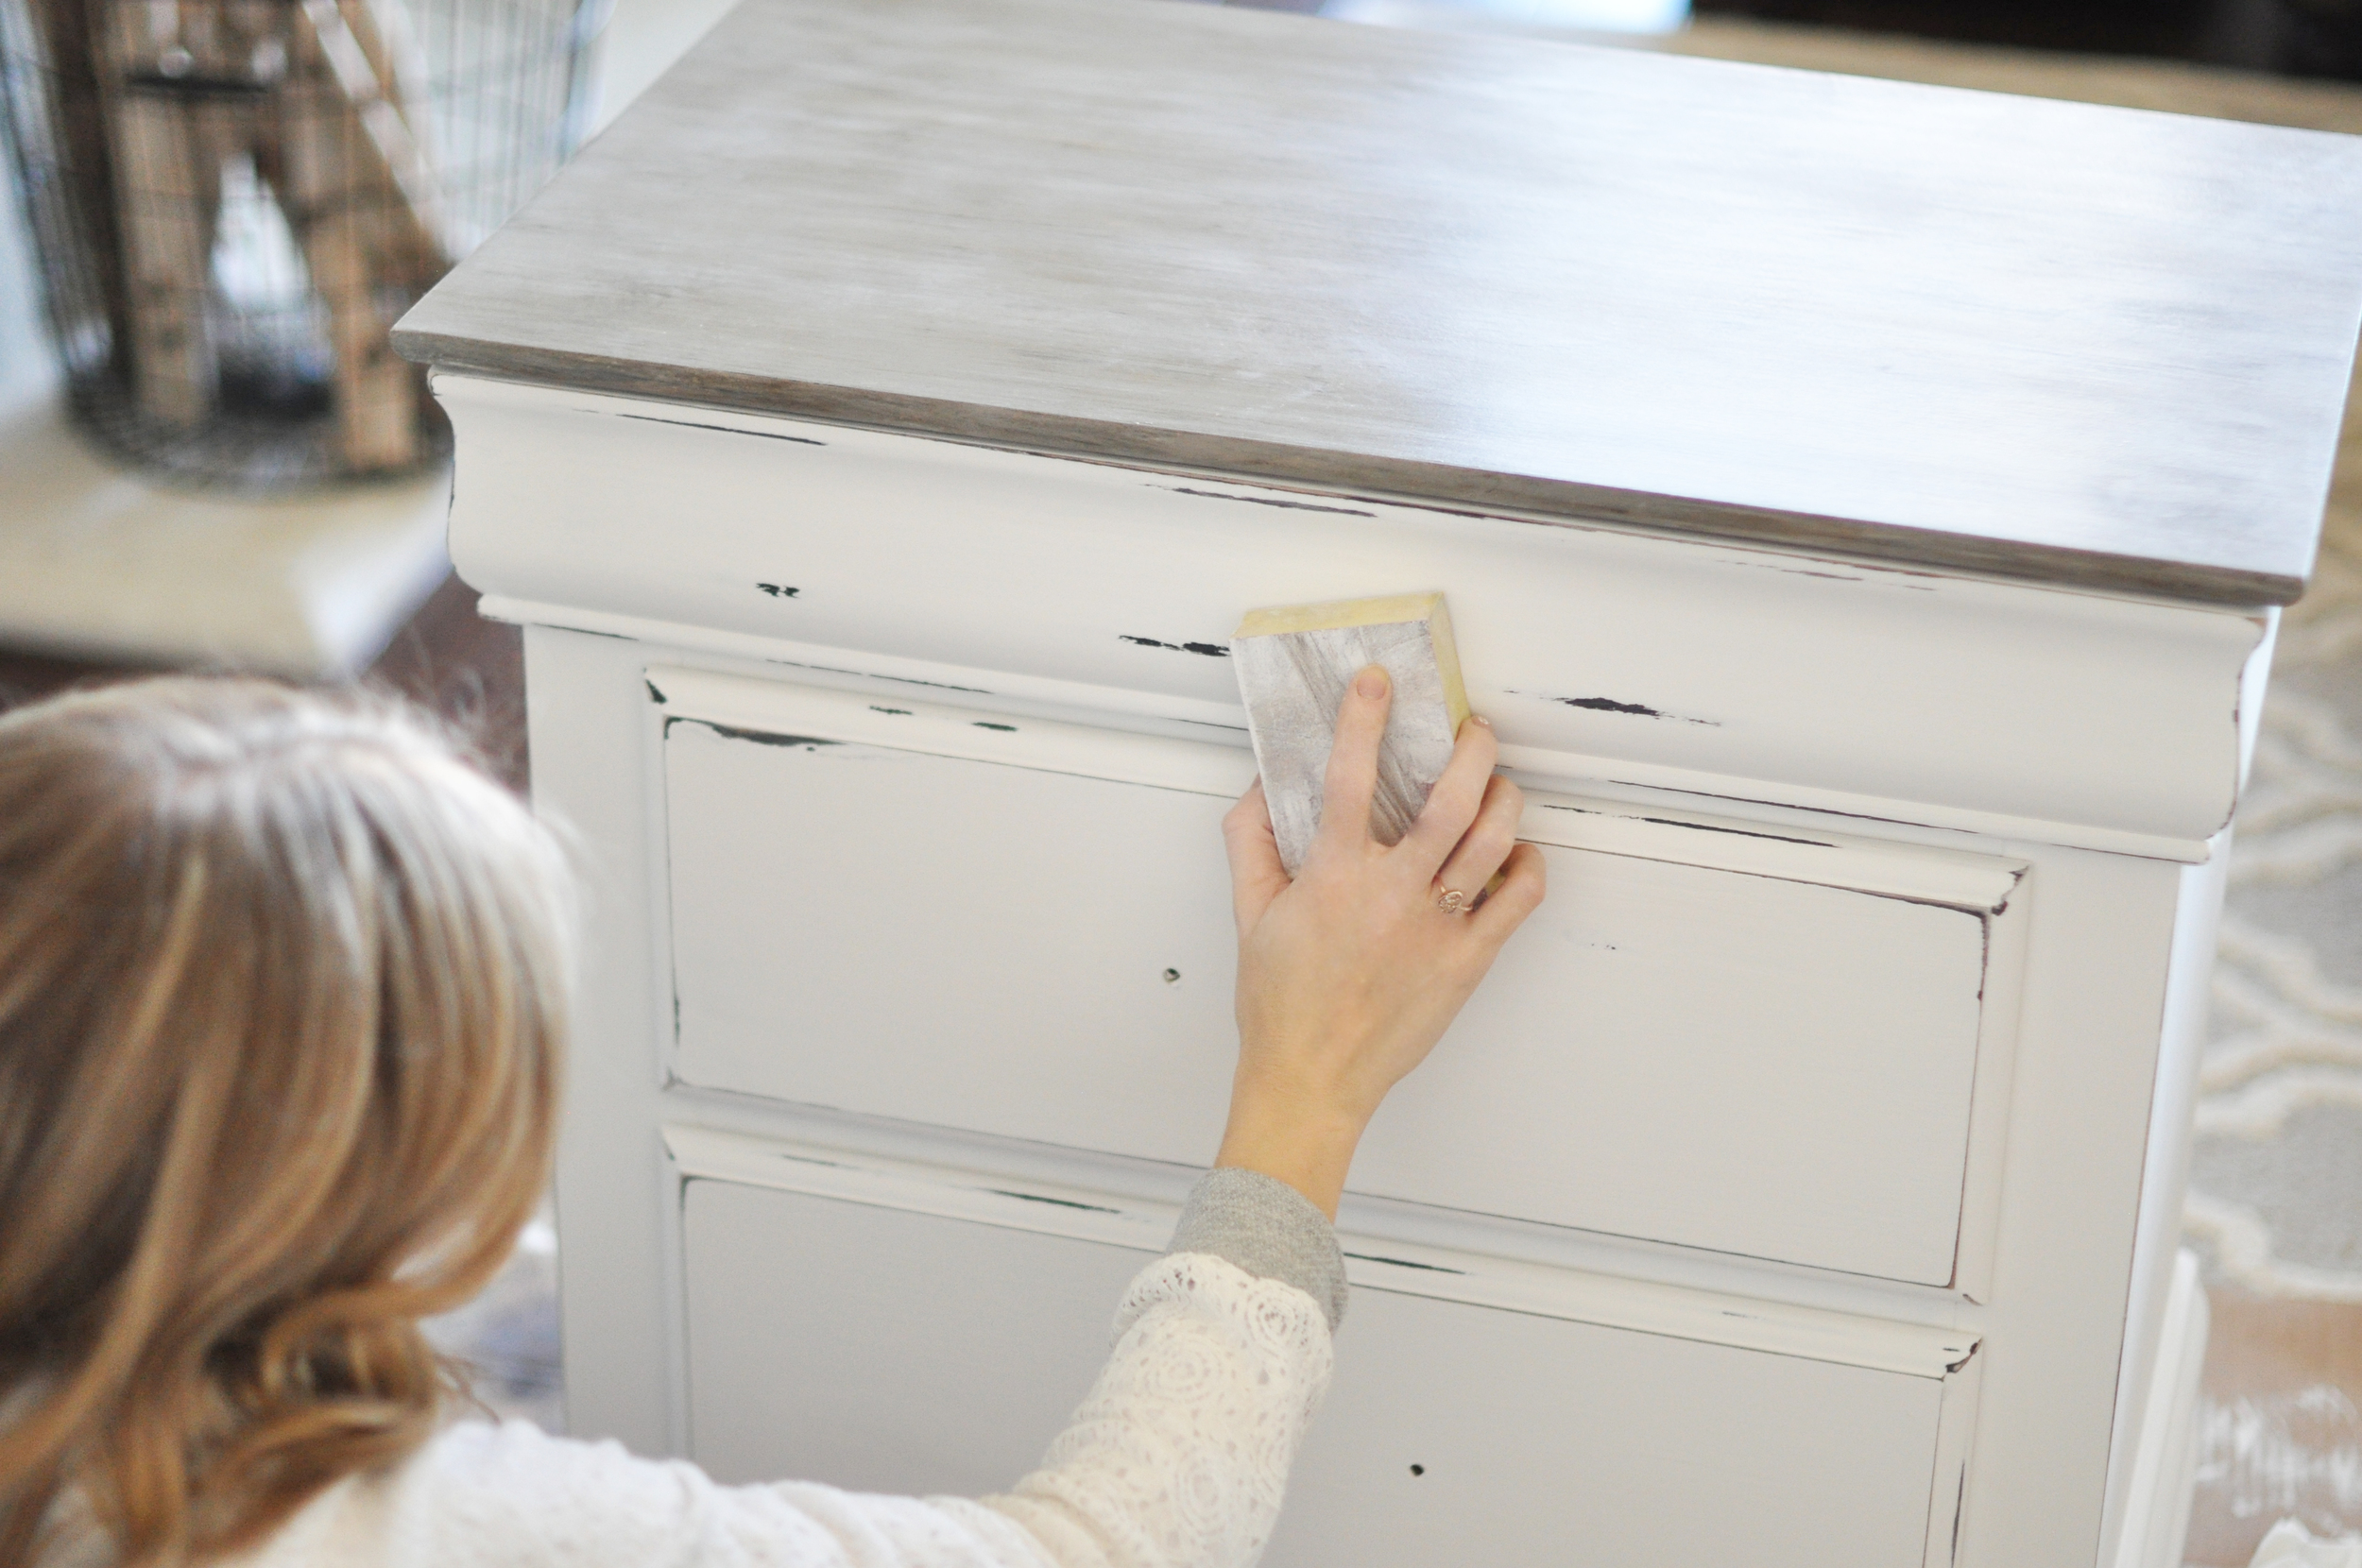
Here we are after three coats, and now we're ready to distress. You can distress as much or as little as you like. It is recommended that you clear wax the piece before you distress, but I actually prefer not to. It just saves me time. Really, the only difference I've noticed in not waxing beforehand is that there is a lot more dust than there is when I do wax.

To distress, you're going to take your sandpaper block and go along the places where the piece would tend to distress naturally, like any corners, edges, and protrusions. If you like a lot of distress, then feel free to go to town. Again, you can distress as much or as little as you like.
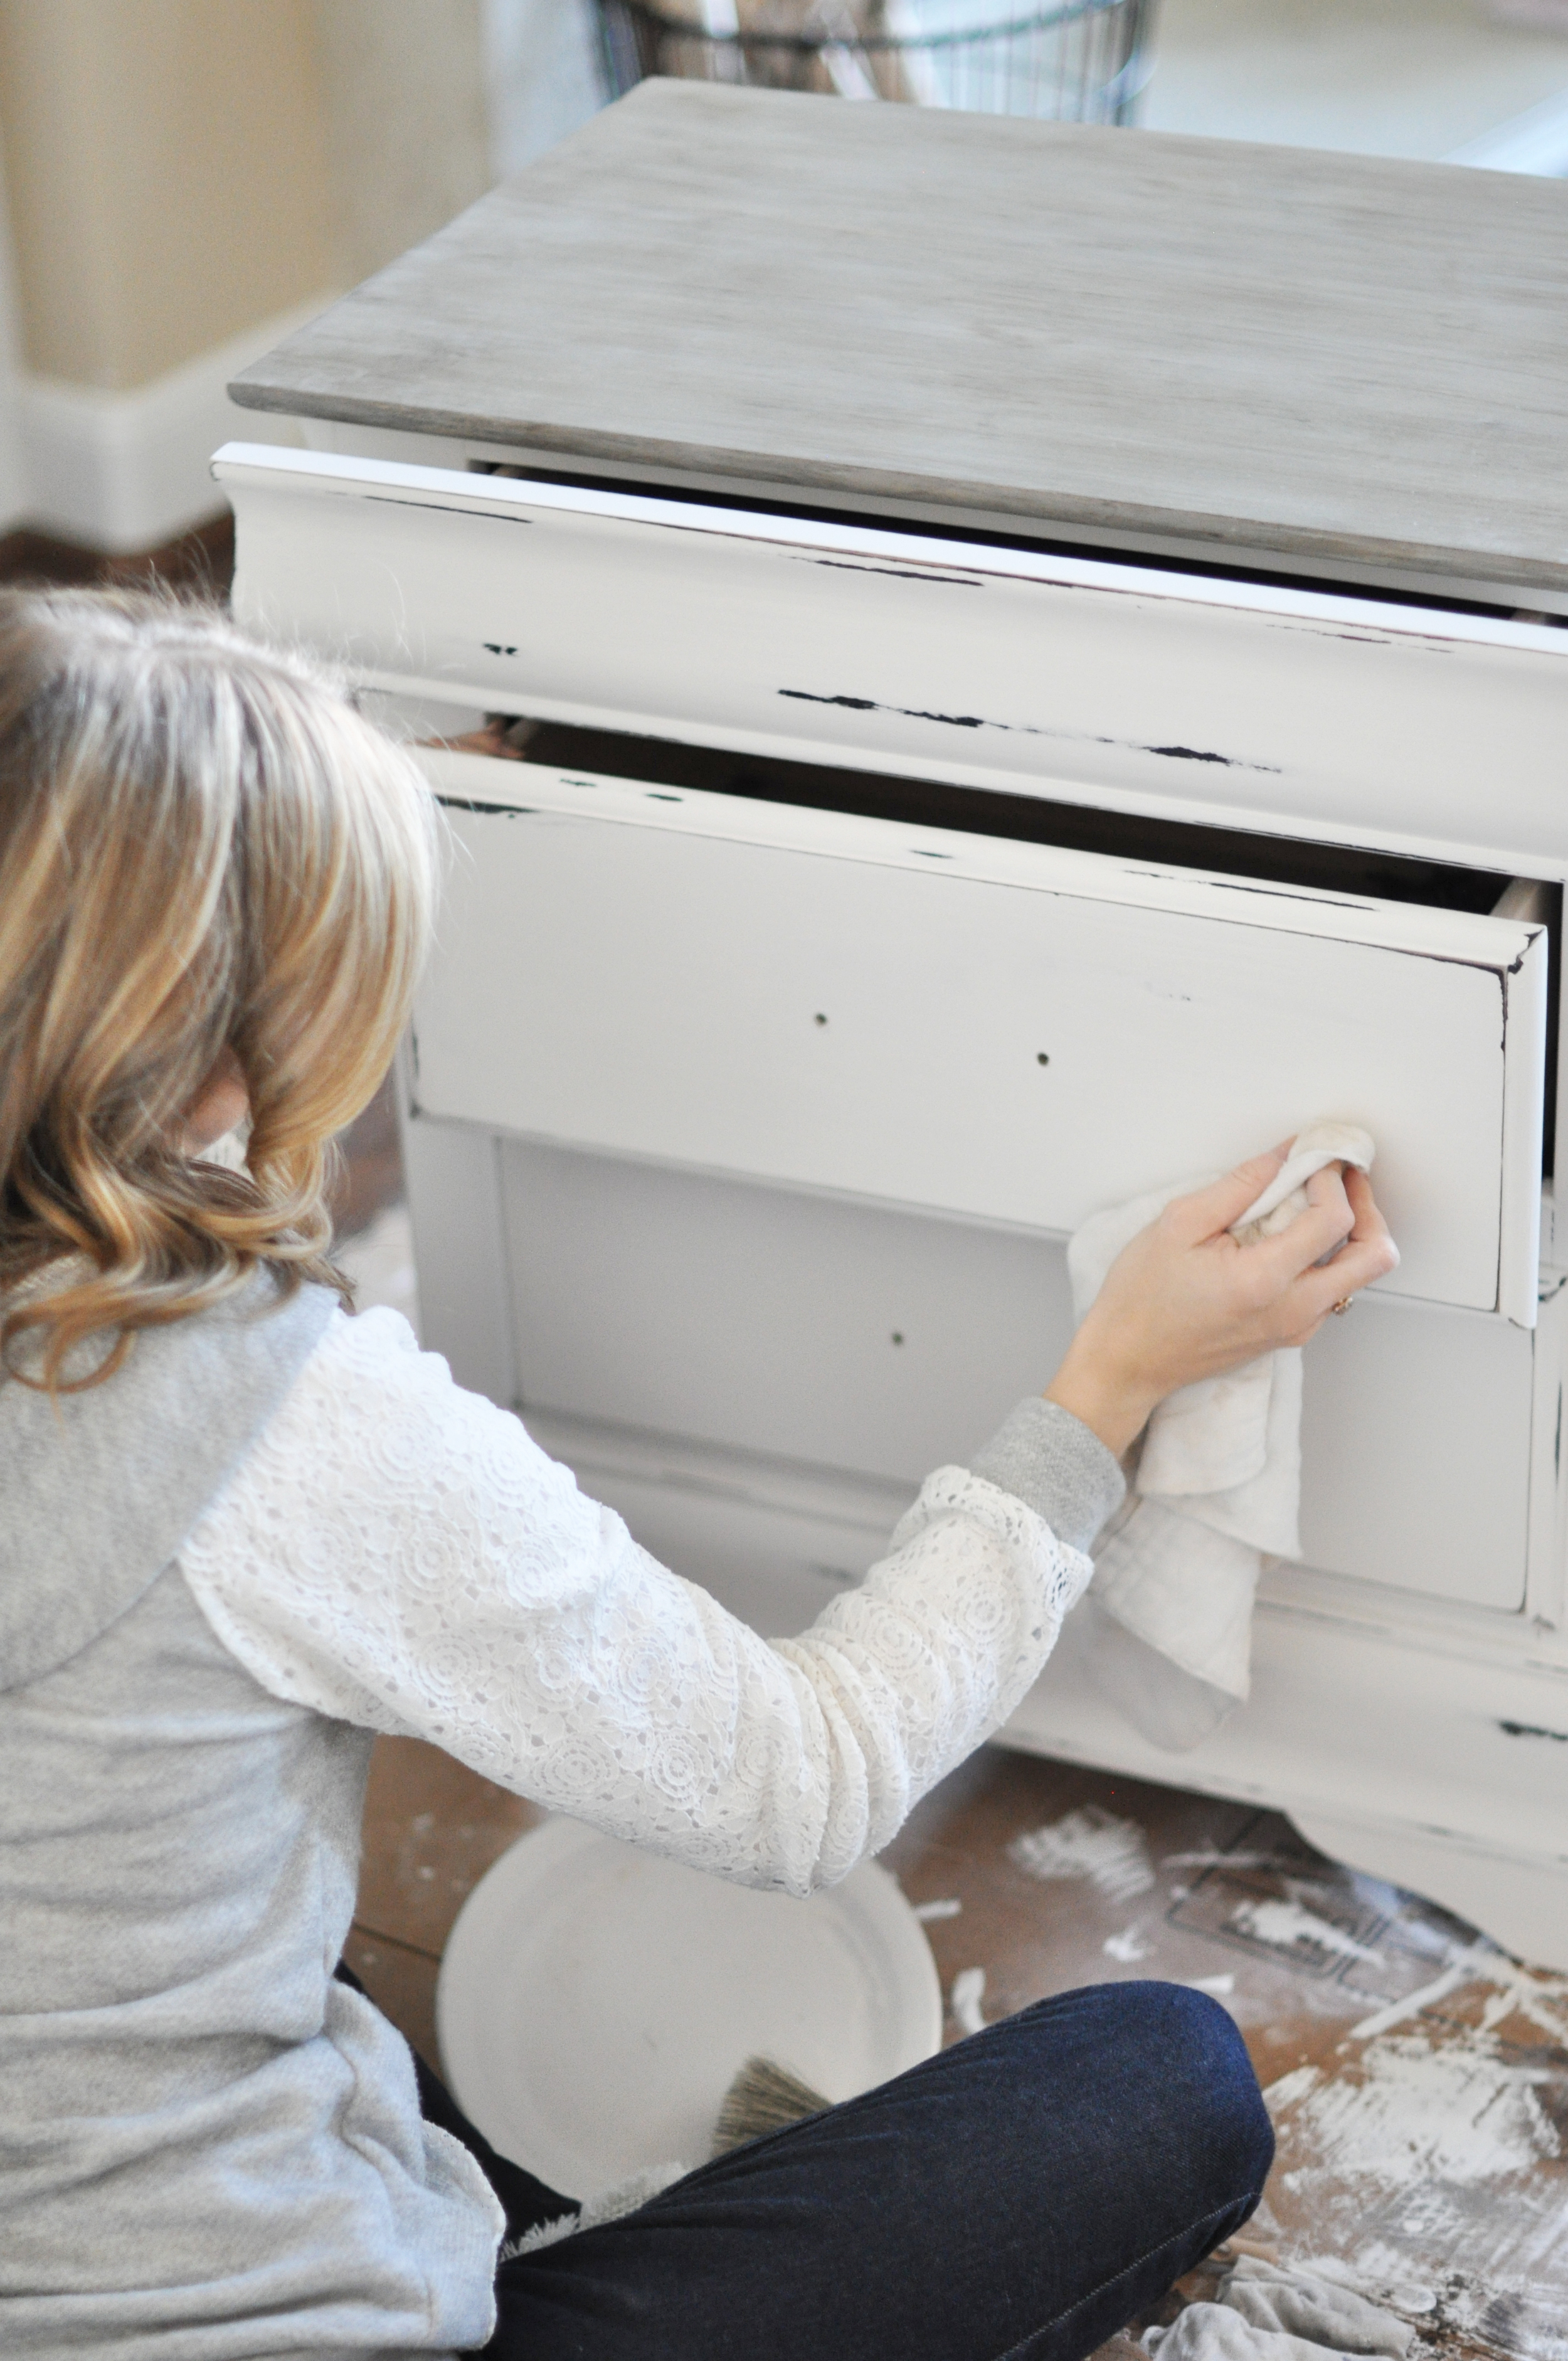
After you've distressed your piece to your liking, clean off the dust really well with a clean damp cloth, and it's time to clear wax the piece. Refer to my instructions on clear waxing above. You're going to do the exact same thing to the rest of the piece that you did to the top.

That's it! You're done! Just reinstall your hardware, and remember to check your wax about 24 hours after you've applied your second coat to make sure it's not tacky and that you're happy with your sheen.