Easter Parade Blog Hop

Happy spring, friends!   Can you believe Easter is just around the corner?!  I'm so excited to have the opportunity of teaming up with a group of amazingly talented bloggers for the Easter Parade Blog Hop!  You're sure to find some fabulous Easter decor inspiration as you "hop" through!  If you're joining me from Sheila's blog, Maison de Cinq, welcome!  I'm so happy you're here! I have to say that Easter is one of my favorite times of year.  Of course I love the cute little bunnies, the Easter egg hunts, the pretty pastels, and the chocolate eggs, but most of all I love what Easter means.  I love the hope it brings.  I love the freedom it brings.  I love that I am a new creation because Christ died for me.  I love how the spring season coincides with the Easter story of new life and renewal.  My daughter has a sweet little Easter book that we read to her every year.  In the book the papa bear shows his son an Easter egg, explaining to the little cub that it's a symbol.  It helps us to remember that just as the shell cracks open and a chick comes out, we remember that Jesus was in a tomb, but he didn't stay dead (God Gave Us Easter by Lisa Tawn Bergen).  He rose!  That is what I love about Easter. 

Now, coming back around to those pretty pastels and cute little bunnies I mentioned before, I'm going to take you through some of my favorite areas of my home that I've prettied up for Easter.  My décor generally stays pretty neutral, but Easter is a great excuse to pull in some happy spring color, and I took full advantage of the opportunity.  Keep in mind that at the end of this post you will find the blog links for the lovely ladies that I've teamed up with who are going to take you on Easter tours of their homes as well. I hope you'll stay and follow along!  You're sure to find some beautiful Easter decorating ideas!


Entryway

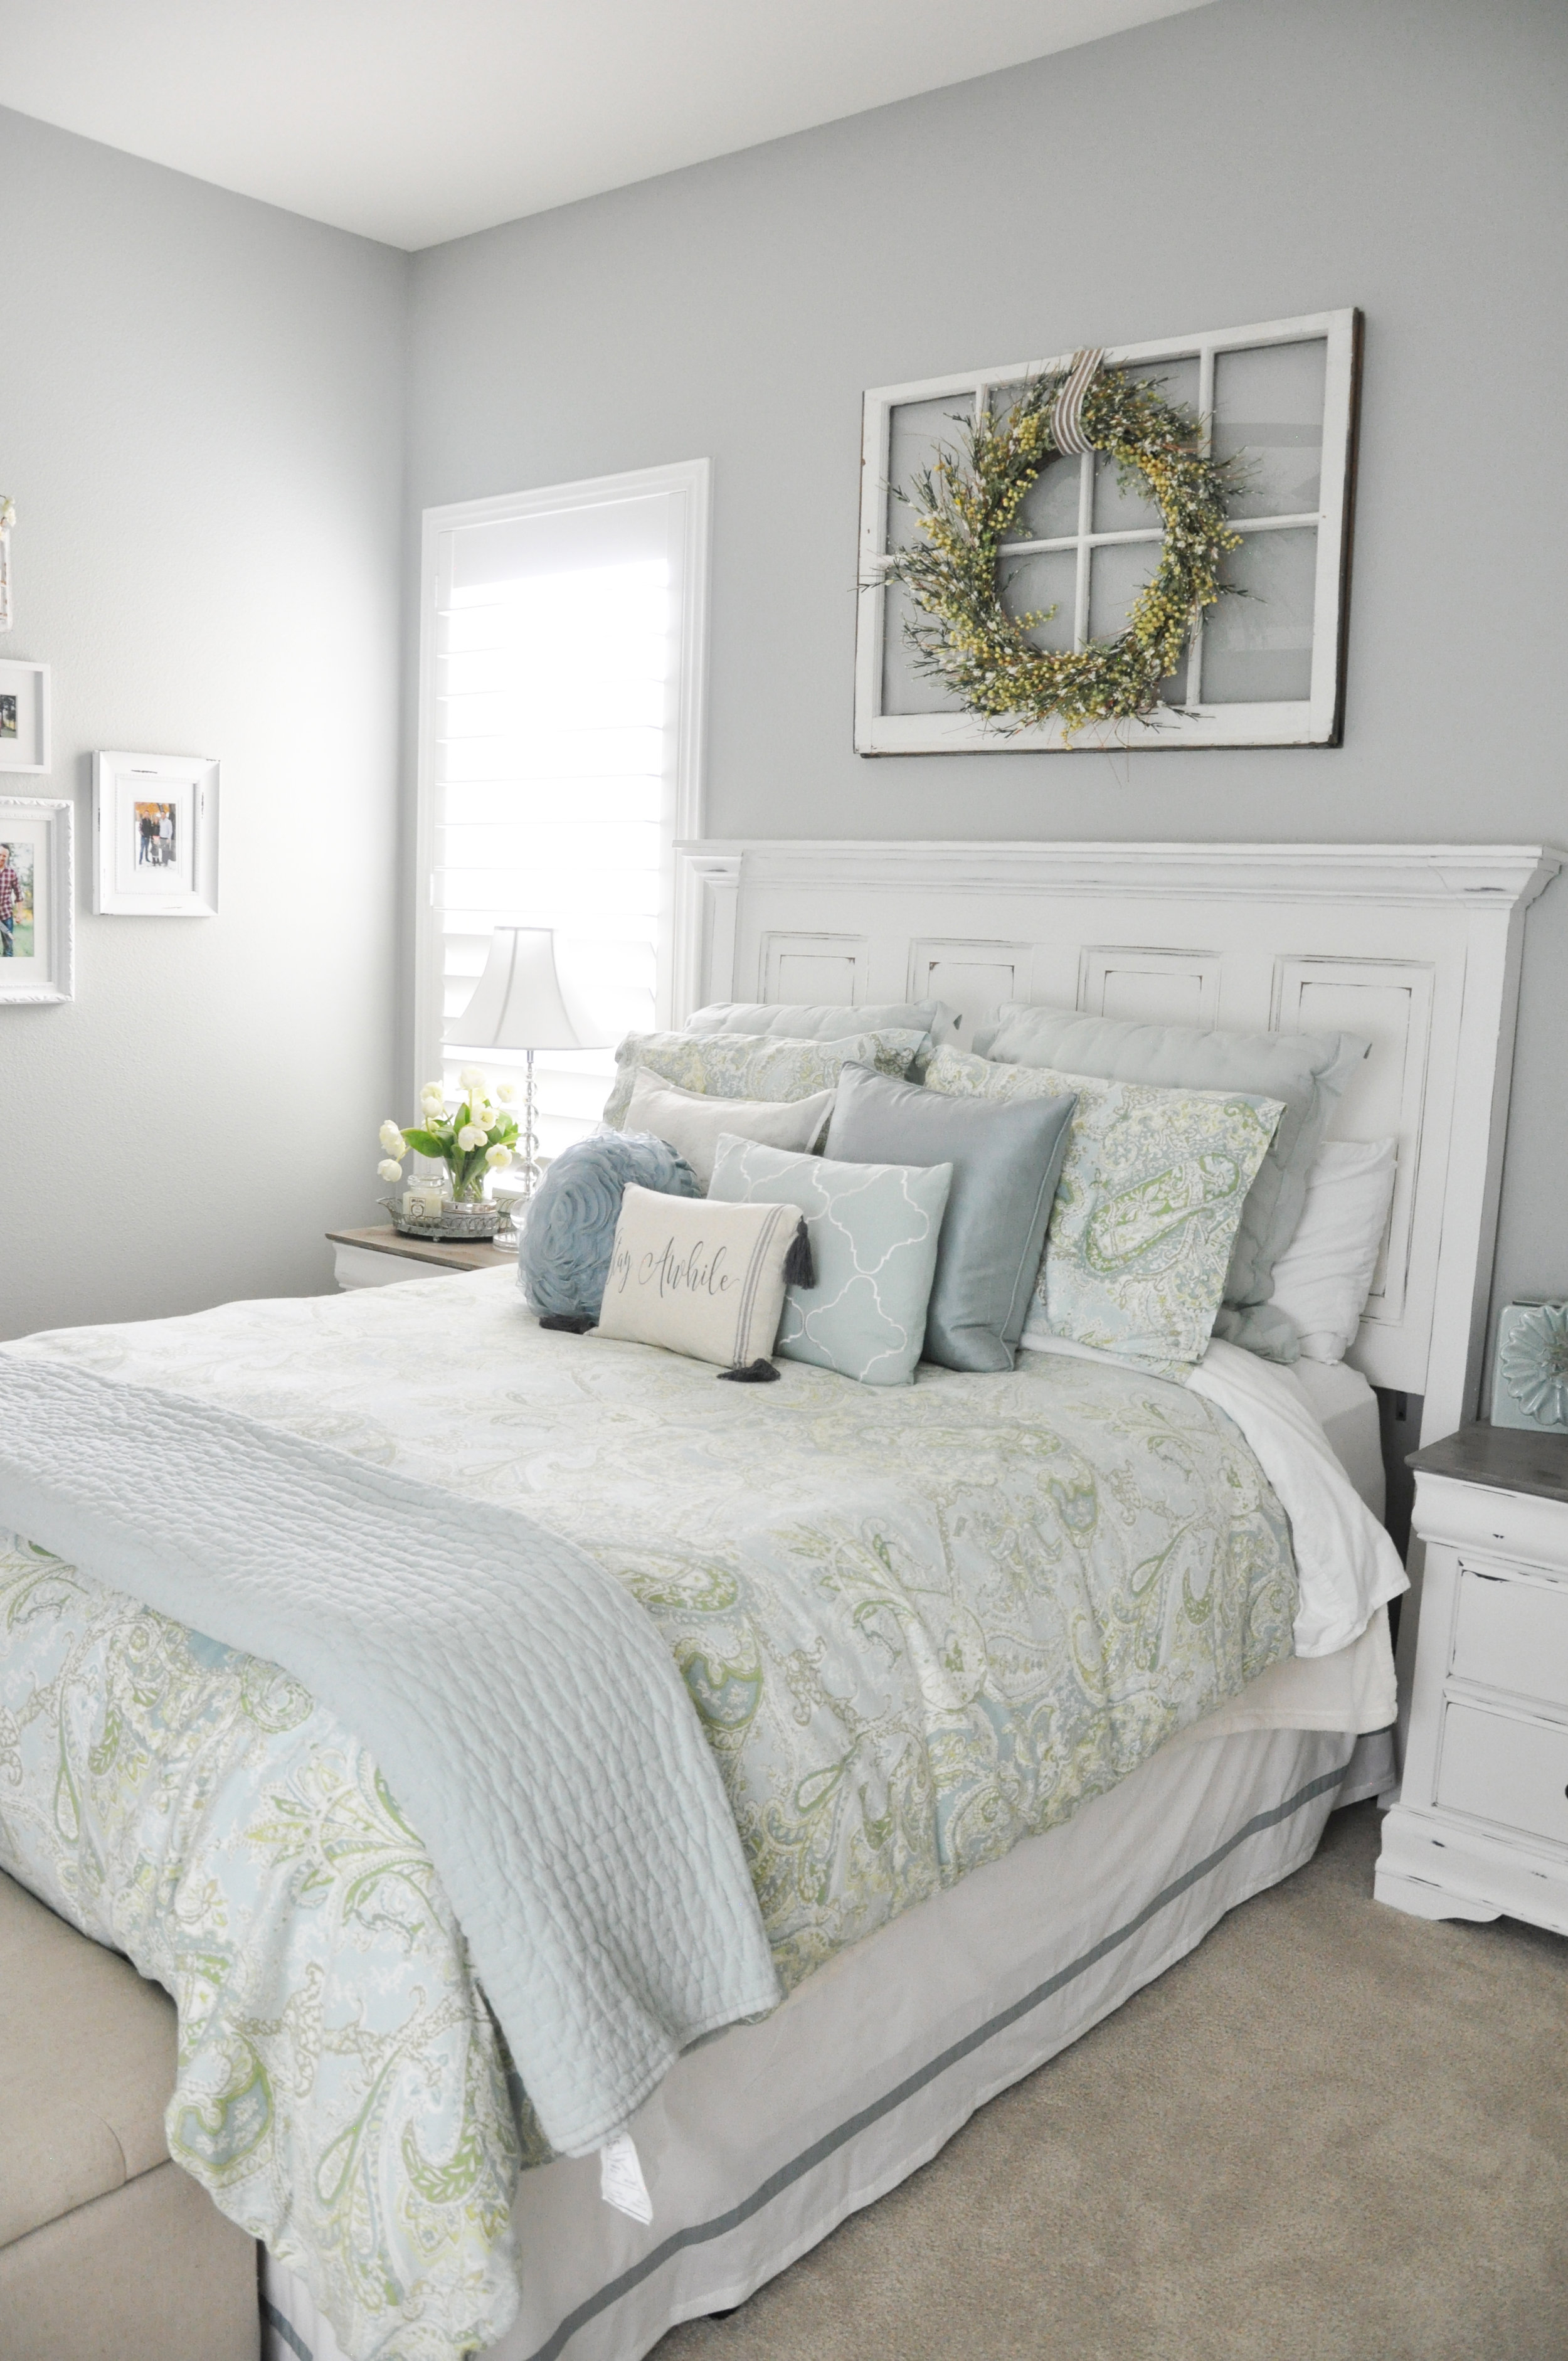
If you've followed me on Instagram or on my blog for any amount of time, you've probably realized that this is one of my favorite areas in my home to decorate.  It's so easy to change out the pillows and décor to reflect the different seasons and holidays.  To make this space Easter ready, I added to my spring pillows the sweet little bunny pillow and swapped out my boxwood wreath for my robin's egg wreath.  Some fresh hydrangeas in an olive bucket finished it off.  Simple but pretty.


Dining Room

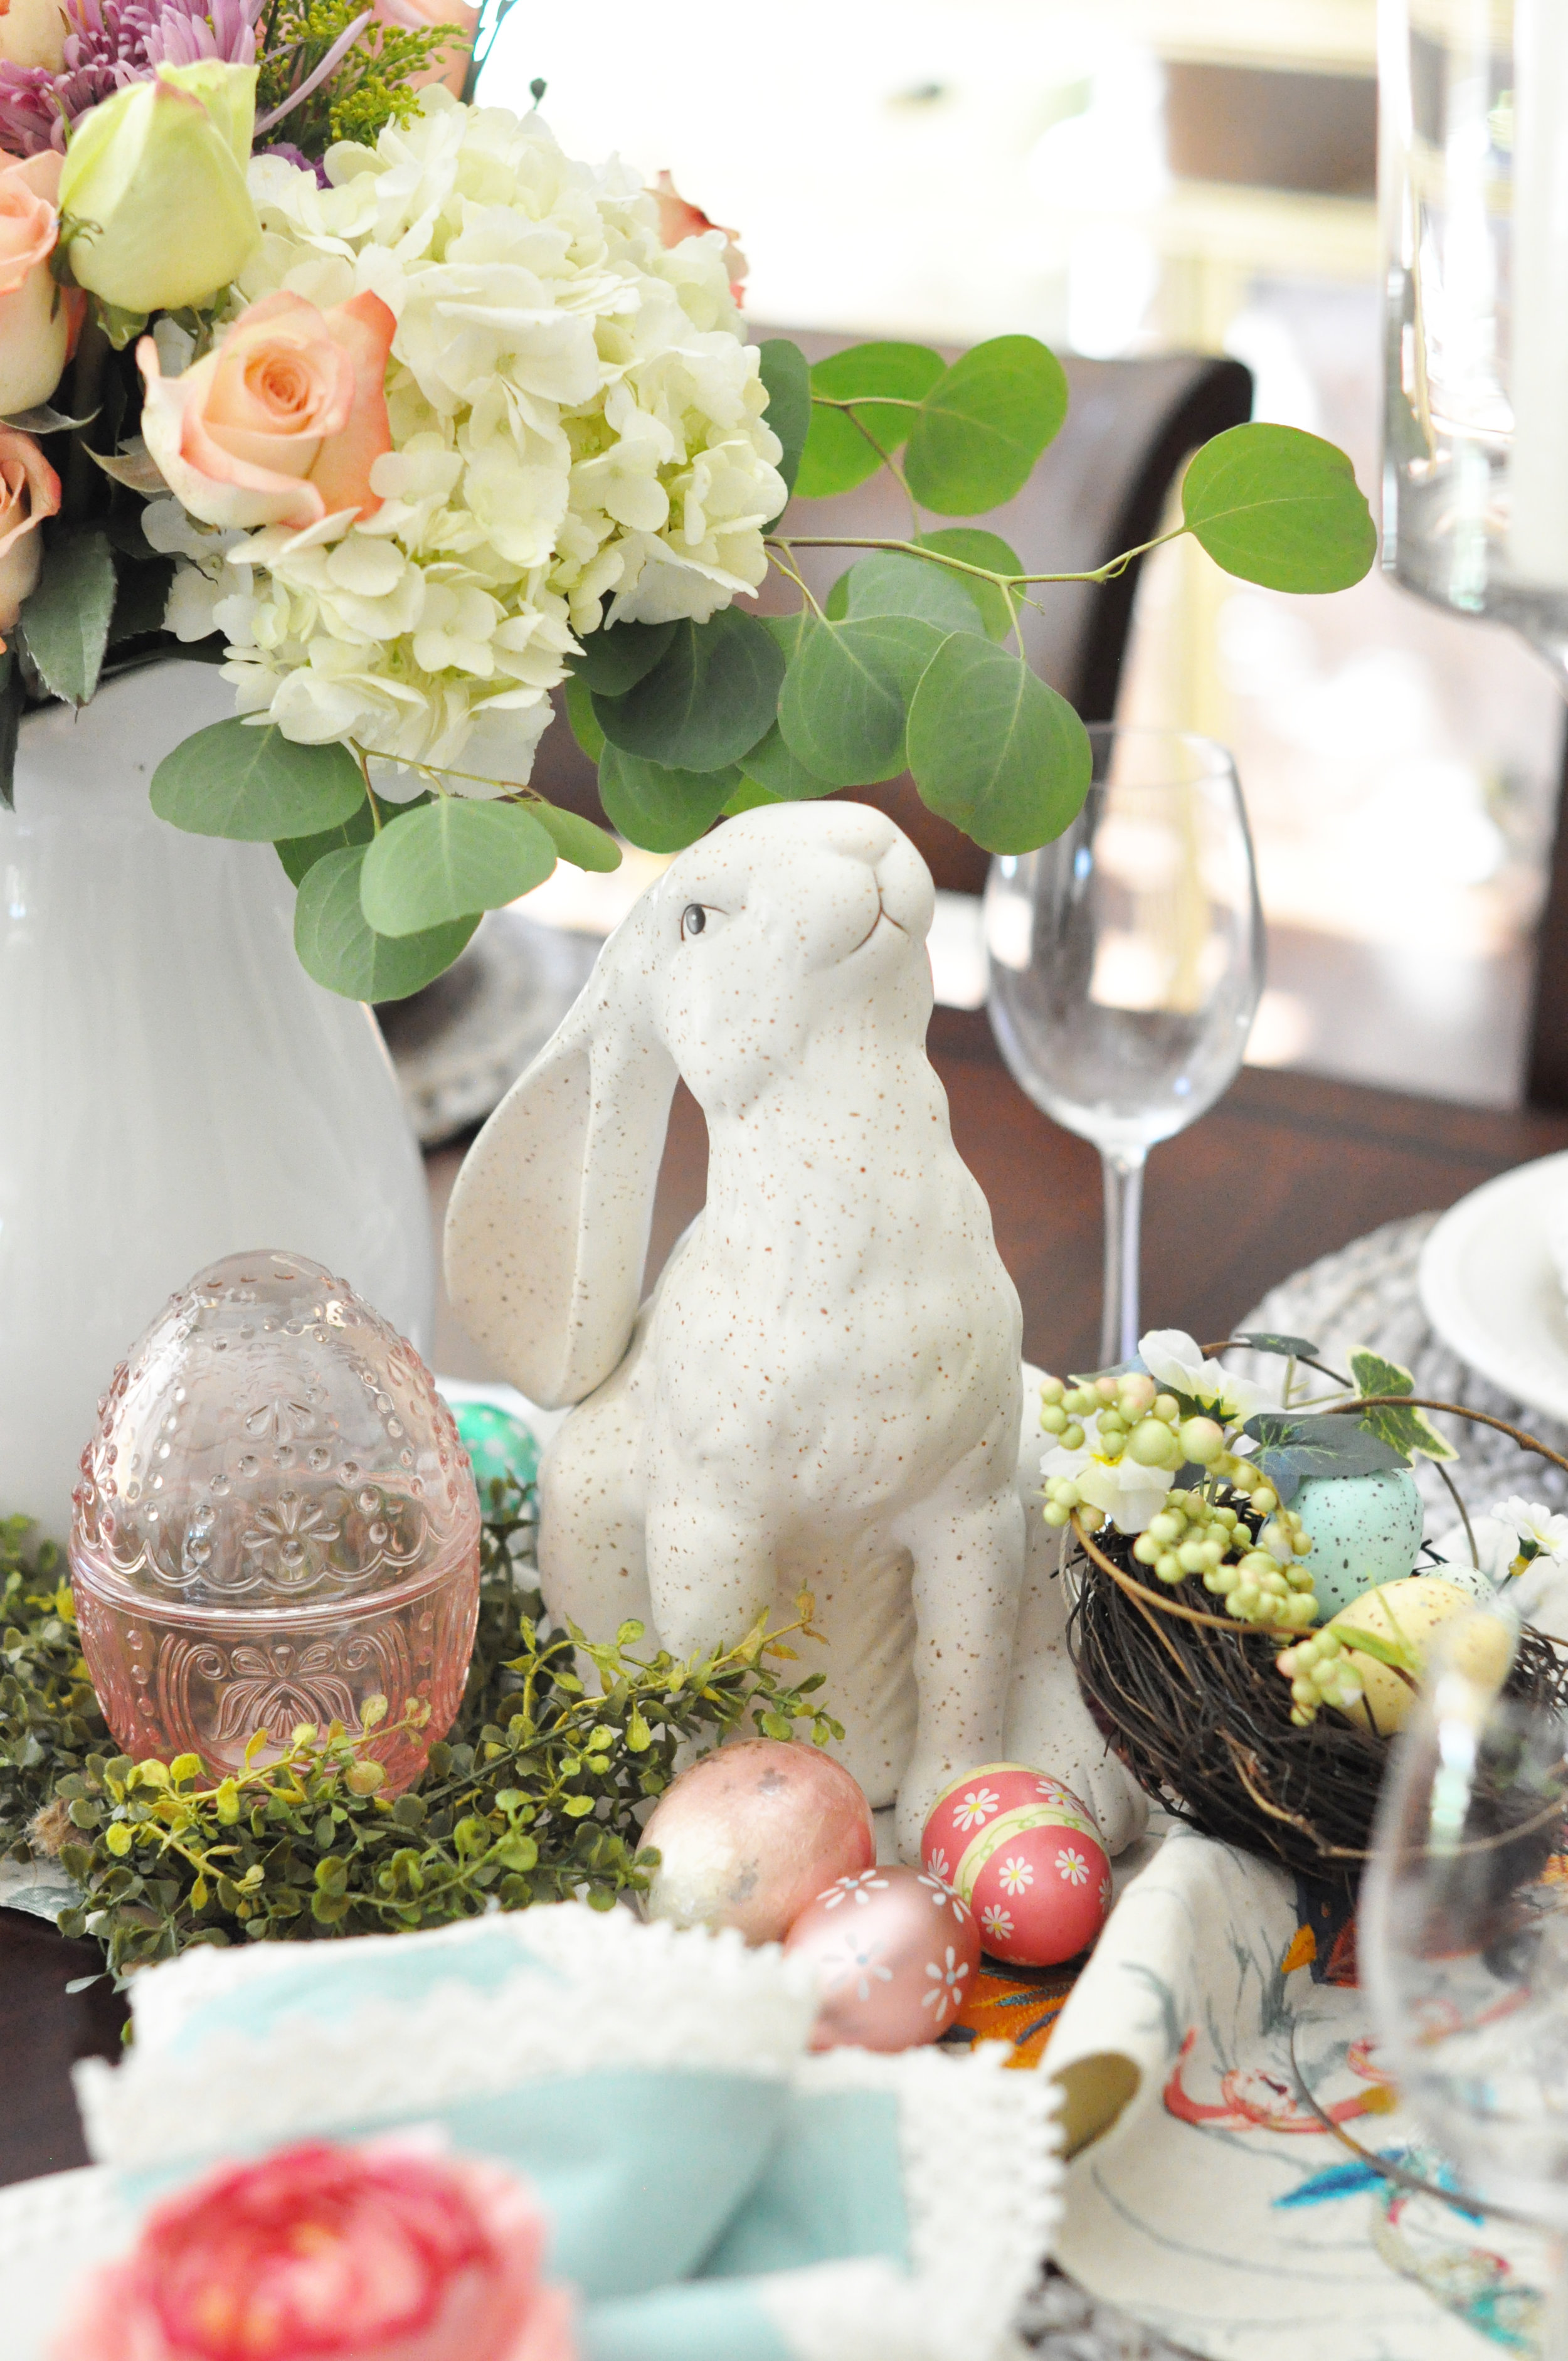
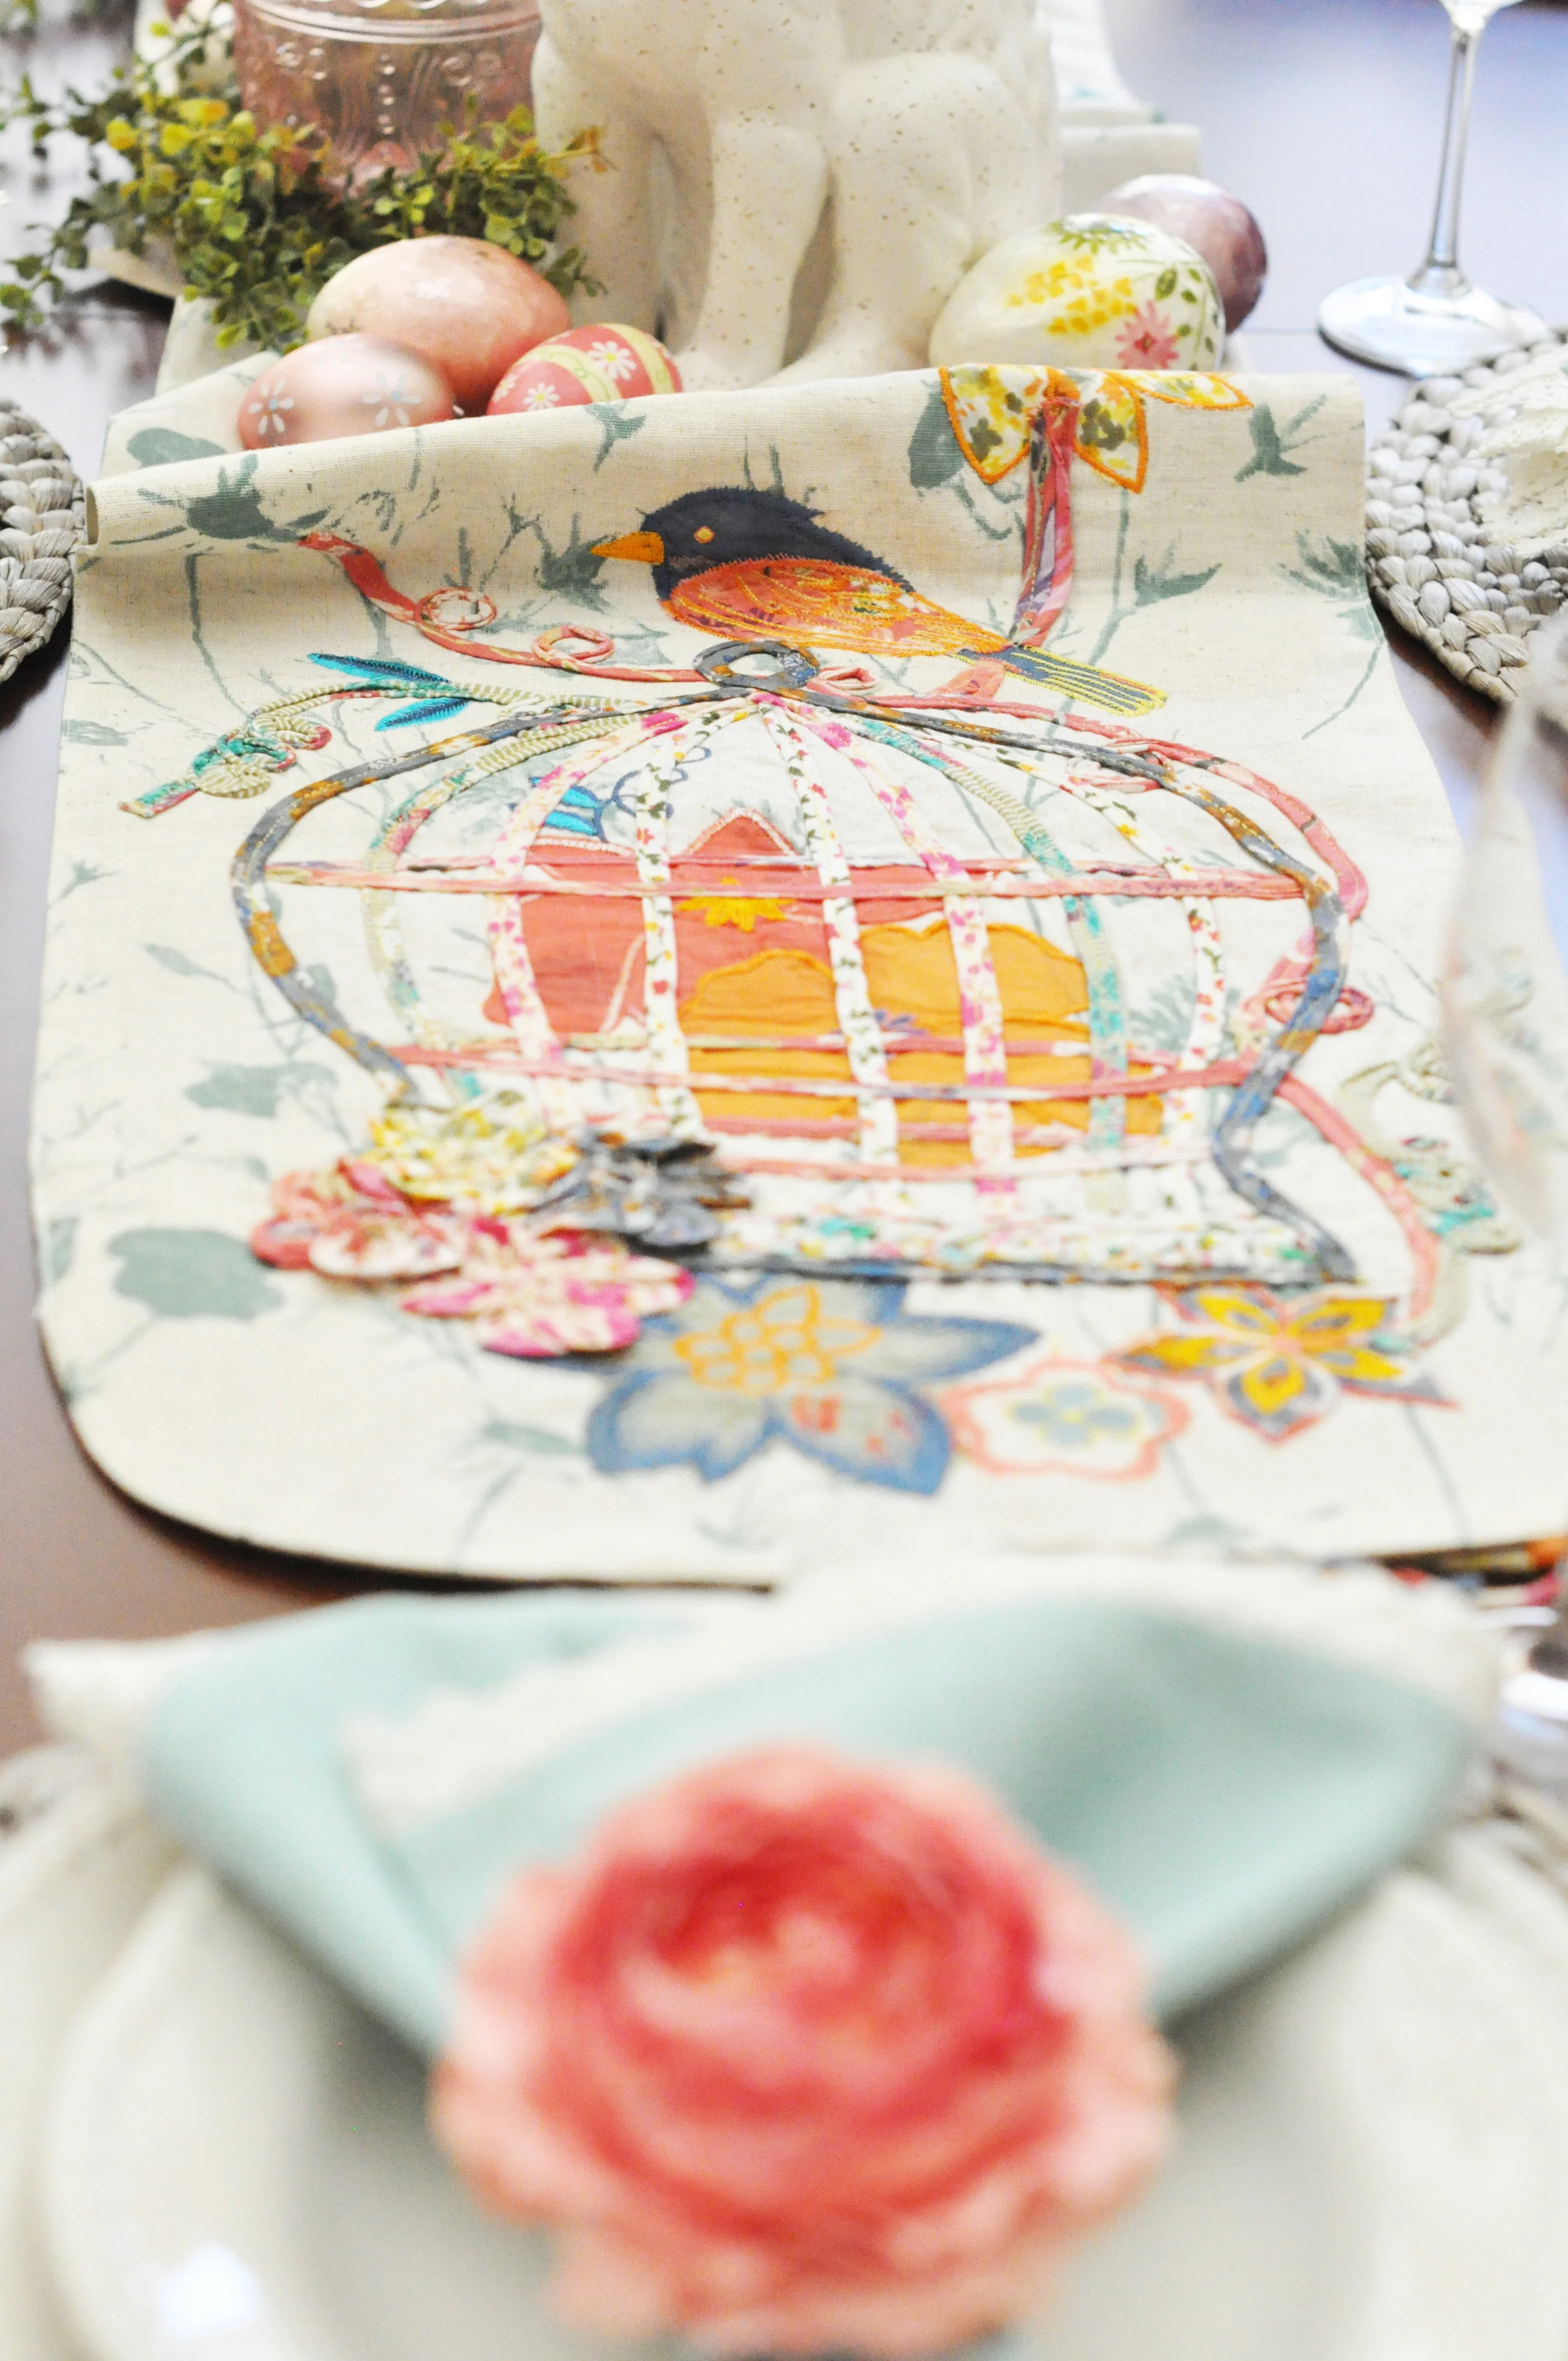
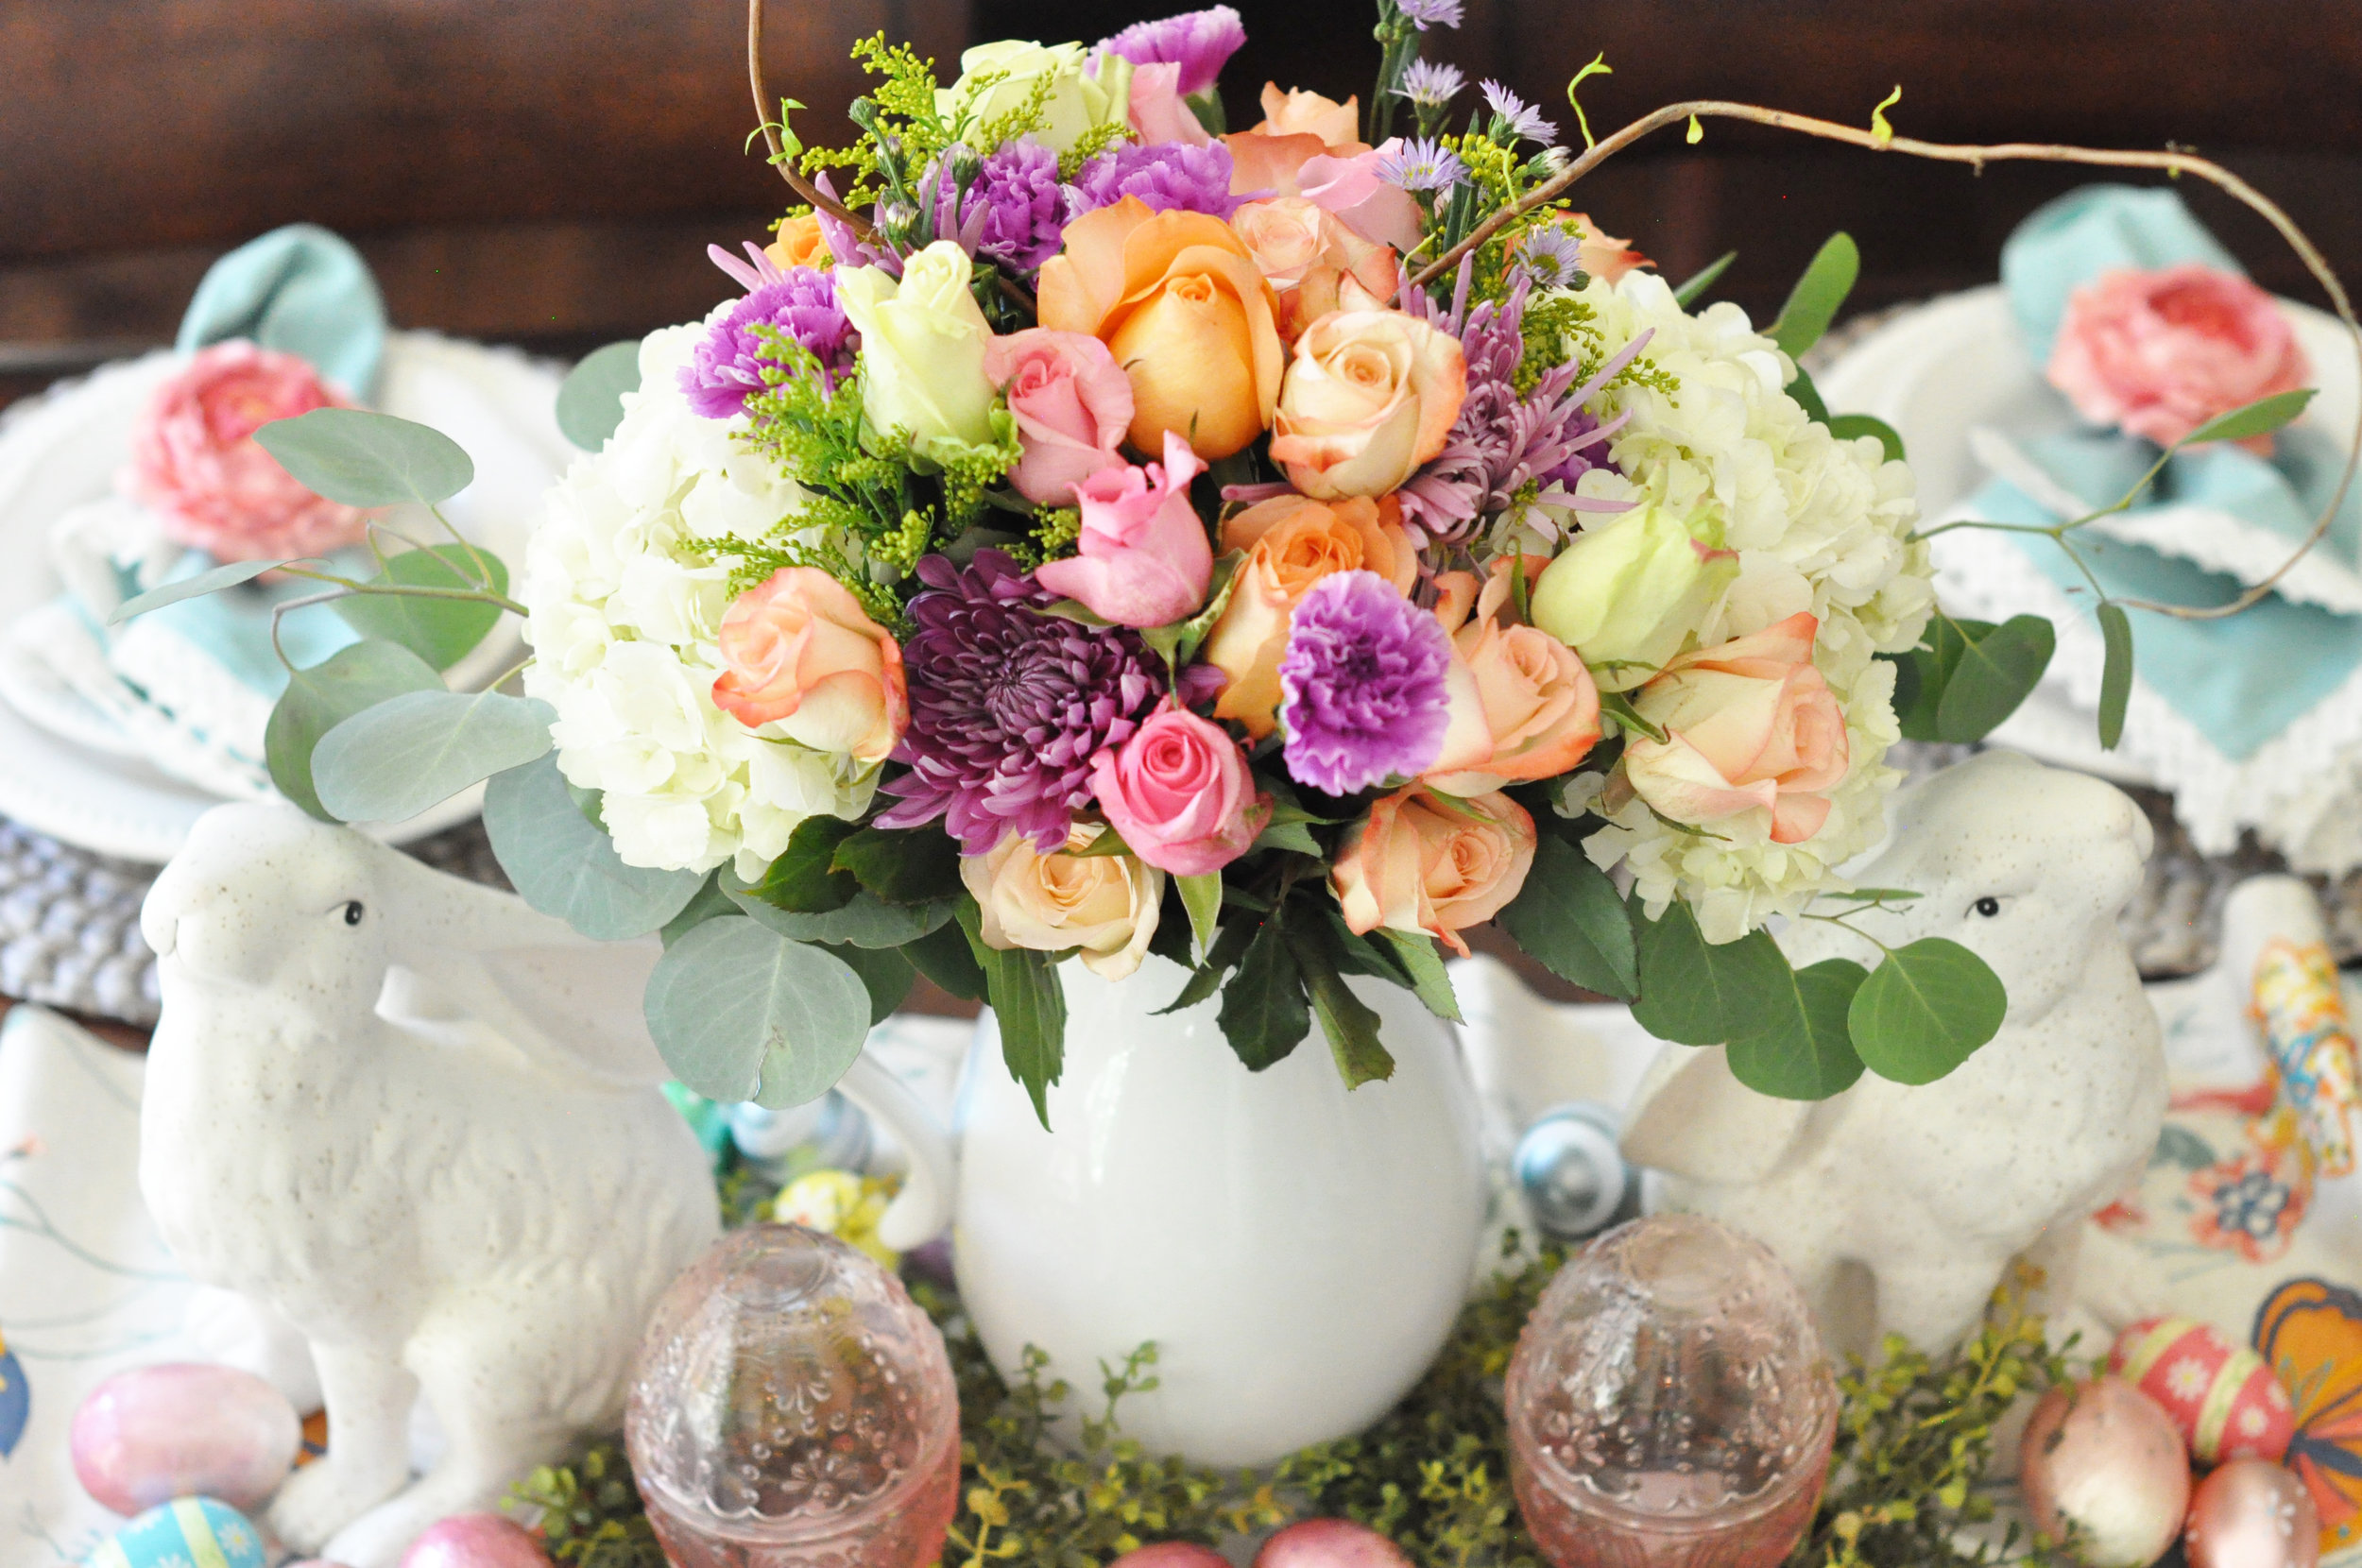
Can I just say that I love tablescapes?  I don't always have the time or the energy to pull them together, but it's definitely something I enjoy.  For my dining table I brought in some soft color.  I know, I'm as shocked as you are ;).  Hey, I said I love pastels, didn't I?  I wanted a pretty tablescape with a little bit of whimsy, so I started with a cute, colorful table runner then arranged some fresh flowers in a white pitcher.  I added in some sweet little porcelain bunnies and some large, pink glass Easter eggs, filling in with some greenery and a few smaller eggs.  Finally, for the place settings, I used my favorite metallic woven chargers and pulled in soft teal napkins tied up with pretty pink peony napkin rings.  The result is a softly colorful, whimsical tablescape that is perfect for Easter gatherings
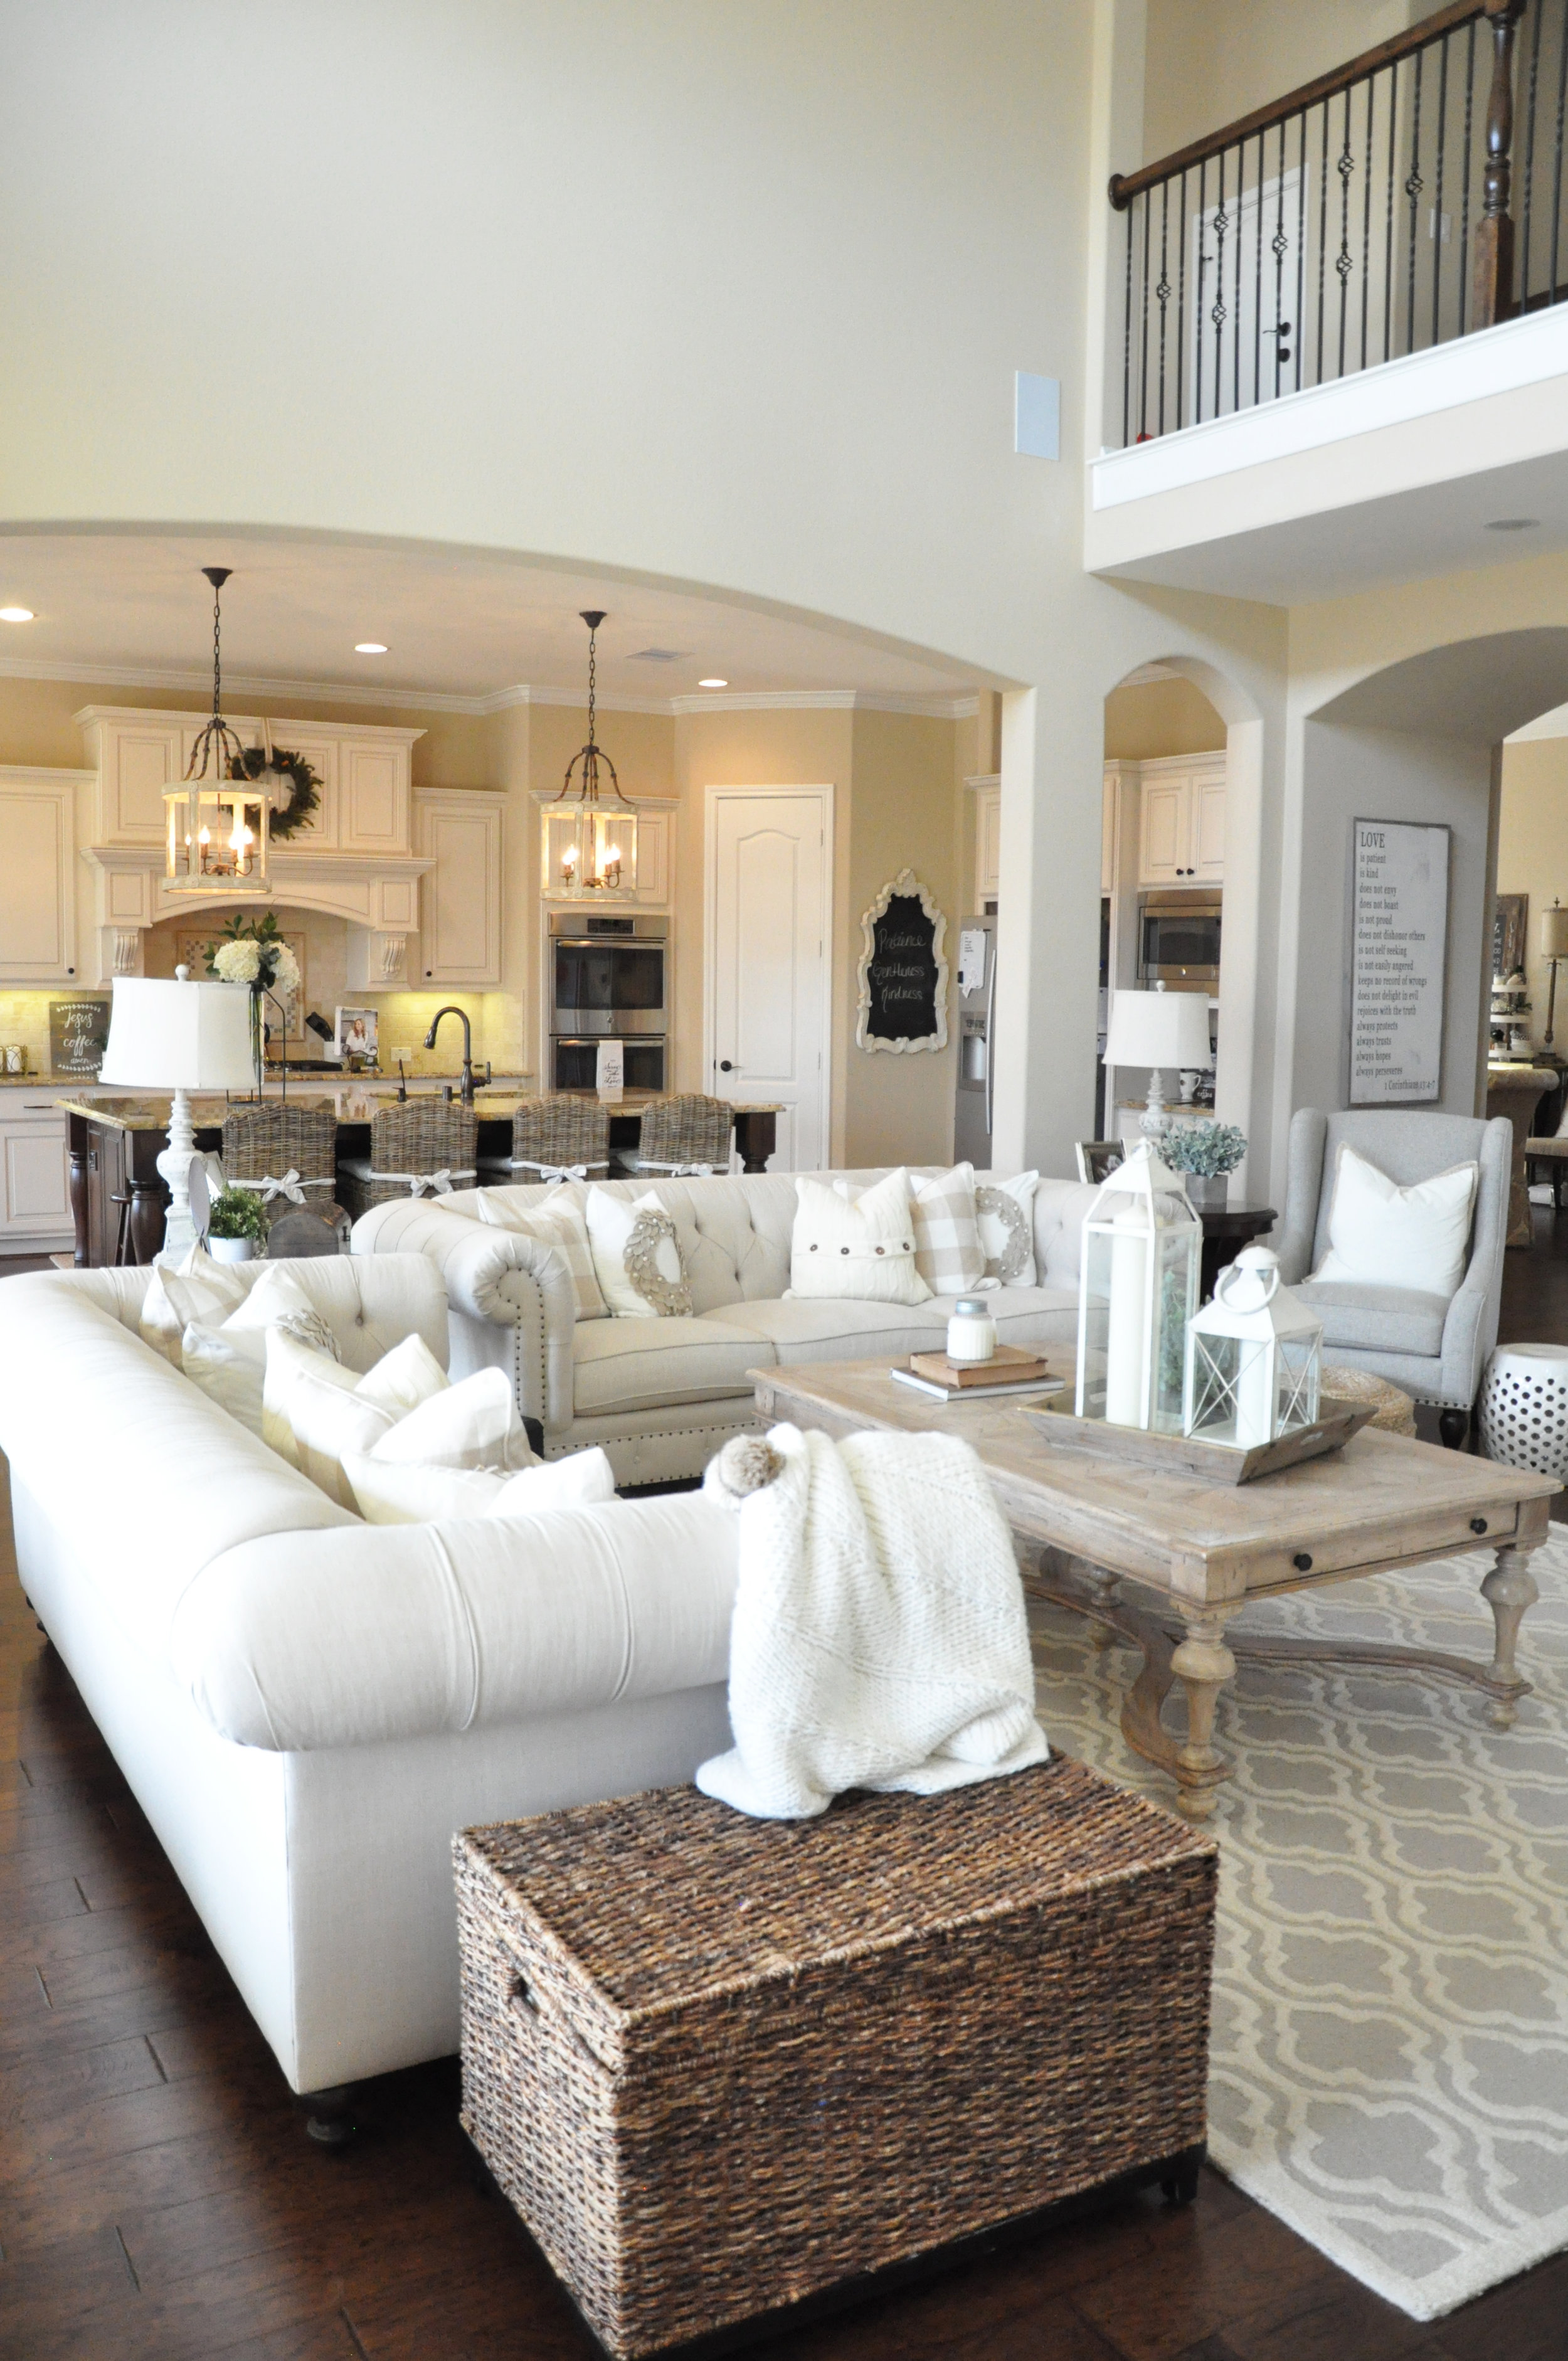

Kitchen Island

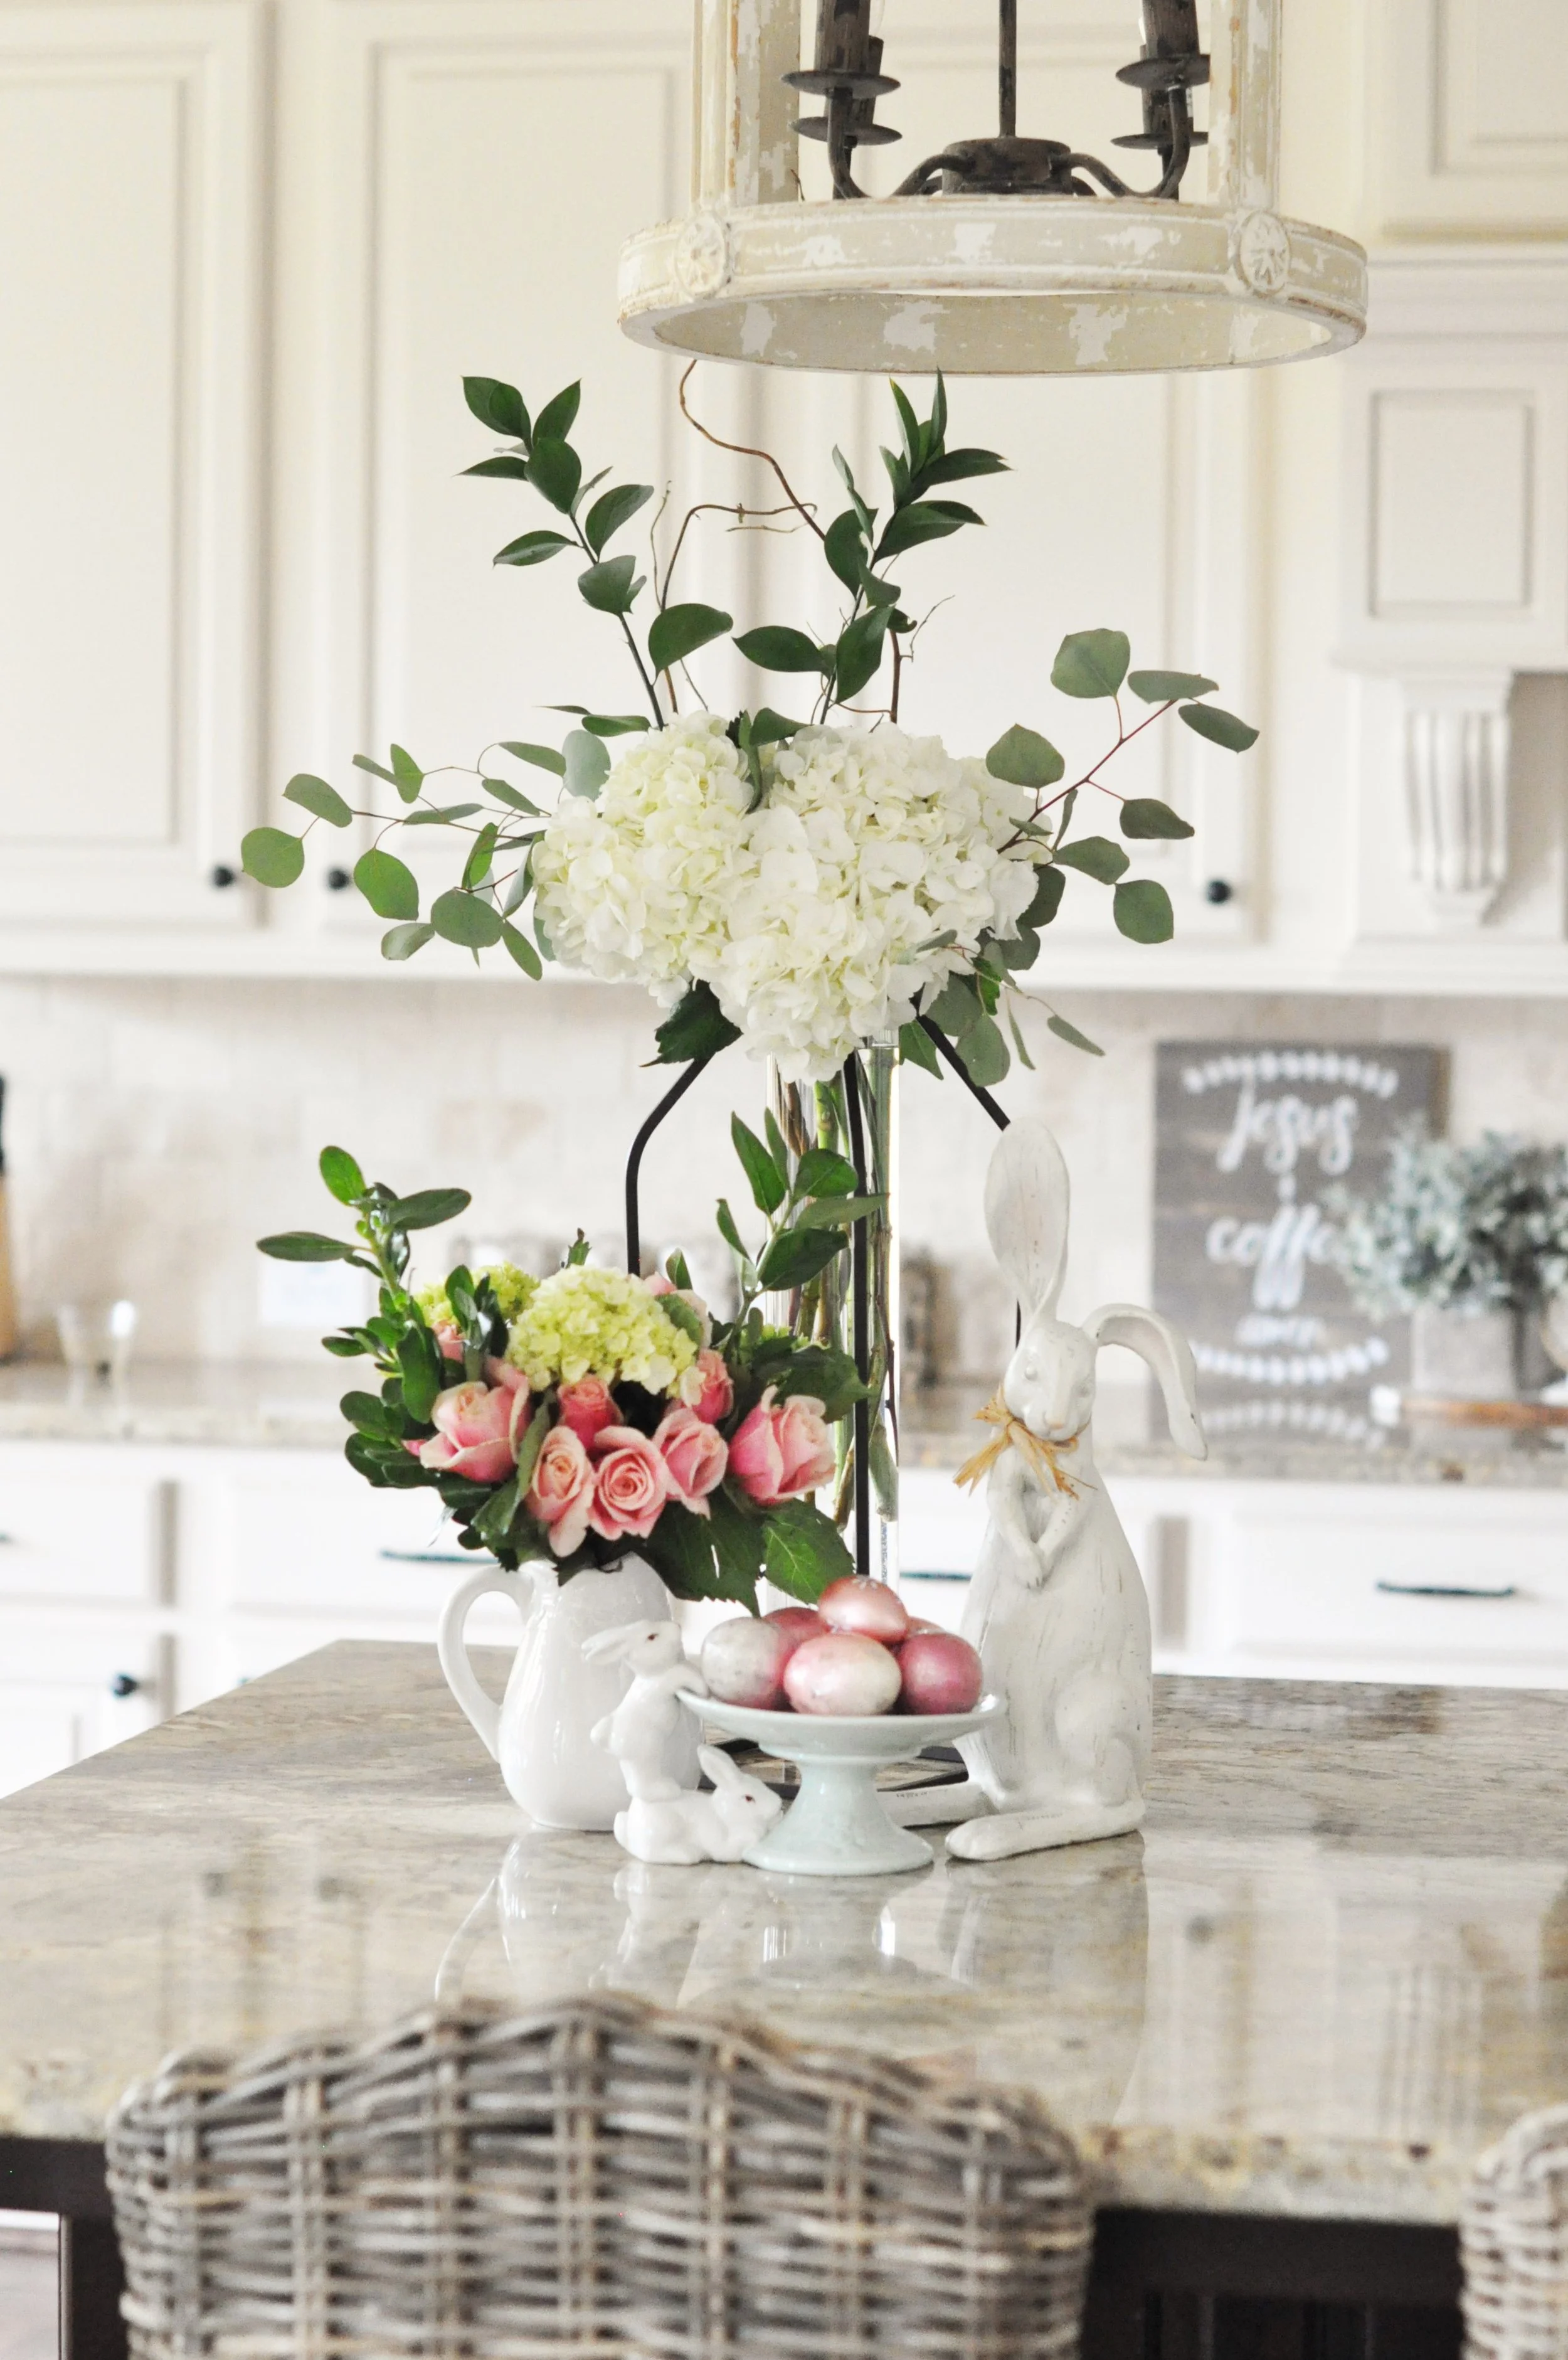
My kitchen island is one of those places in my home where I always like to have something pretty, whether it be a done up tiered tray or a vase of fresh flowers, it really dresses up the kitchen.  Right now I'm kind of loving my industrial looking flower vase, so it has been gracing my island for the past few months.  To add a little touch of Easter, I pulled in a small, white vase of fresh flowers, in addition to my usual white hydrangeas, and some more cute little bunnies.  The little bunny pedestal tray is my favorite :).


There you have it, friends.  Thank you so much for following along with me!  Now be sure to hippity-hop on over to Kim and Lacey's blog, Styled with Lace, as well as all of the wonderful blogs listed below.  You're sure to find all kinds of gorgeous Easter goodness!

XOXO

Jennifer


Summer ~ Summer Adams Designs

Lisa ~ Farmhouse on Boone

Sheila ~ Maison de Cinq

Kim & Lacey ~ Styled With Lace

Deborah ~ B Vintage

CC ~ CC and Mike

Kathleen ~ Lindsay Hill Interiors

Amie ~ Meme Hill Studios

Joan ~ 2 Ladies and a Chair


Easy DIY Valentines

If you're planning to head out this weekend in search of Valentines for your kids' parties next week, take a look at this sweet DIY idea for Valentines first.  They're super cute and easy-peasy, so you and your child can work on them together.  You may even have some of the materials needed to make them on hand!  Enjoy!


In order to make these, you essentially need five things, heavy paper hearts, washi tape, stickers, bubbles, and a pen or marker.  I will show you the materials I used and where to get them.  First off, the paper hearts...I bought these in a pack of 21 from Paper Source.  You can find them here.  I purchased the "Happy Valentine's Day" stickers from Paper Source as well, and you can find those here.  If you don't have a Paper Source near you, you could likely pick up similar items from your local craft store.  I purchased the washi tape at Michael's, but you can find it nearly anywhere these days.


The heart stickers and bubbles came from the Valentine's section at Target.  This huge container of stickers was only $5, and the bubbles were $3 for 16.  Score!


That's it for materials!  You don't even need scissors or glue, that is unless you plan to cut out your paper hearts, which is totally fine.  Now that we've covered materials, lets go over a few quick steps.  The first thing you want to do is write your "Tos and Froms" on the back of the heart.  It's kind of tricky to do it once you get the bubbles taped down so definitely do that first.  I wrote the "Tos," (in this case it was requested that we simply write "To: My Friend") and I will let my daughter come back later and write the "Froms."  She's four and is still practicing writing her name :).


Next flip the Valentine over and add your text sticker (in this case the "Happy Valentine's Day" sticker) towards the top of the heart.


After that, place your bubbles and secure them with two strips of the washi tape laid in and "X" over the bubbles so they're nice and secure.  You can cut the tape if you want nice, clean edges, but I was fine just tearing it.  As a side note, you obviously don't have to use bubbles here, it can be anyting you want, lollipops, chocolates, pencils and erasers, lip gloss, etc. 


Next, add your heart stickers anywhere you want around the bubbles to pretty up the front of the Valentine.  I let my daughter help with this part.  She loves stickers!


That's it!  You're done!  See how easy that was!  Here are a few photos of our finished products. 

I hope you enjoyed this little tutorial and that it inspired you to make some creative Valentines of your own.  Happy V Day, friends!

XOXO

Jennifer

Cozying Up Your Home For Winter

We're nearly a month past Christmas already.  Can you believe it?!  Our Christmas décor has been down for a few weeks now, and I don't know about you, but for me after all the cheery Christmas decor comes down my house can feel a little empty. Let's be honest, depending on where you live, there can be a lot of winter left after Christmas is over.  For this reason, I like to add some coziness back into my home with some simple winter touches. Some of these things can actually be items that you incorporated into your Christmas decor, such as pine and birch accents, pillows, and wreaths, and maybe even some stags.  As long your items are not overtly Christmas related, they should work as winter décor.  I'm going to share some of my favorite tips for cozying up your home for winter.  I hope they inspire you to bring some winter coziness into your own home.  Just because Christmas is over, that doesn't mean that your home can't still be warm and inviting all winter long.


Add Cozy Throws and Pillows

I love to cozy up my home for winter by bringing in cozy throws and pillows in soft neutral colors.  In my opinion, light neutrals are wonderful for winter, but you could also pull in darker neutrals, as well as blues and greens for a soft winter look.  The one color that you want to remove as you're transitioning to winter décor is red.  Together with other winter elements, it can look Christmasy.


Decorate with Natural Elements

A great way to add some yummy texture and coziness is through the use of natural elements, such as birch, pine, and cotton.  A lot of those pine trees you used for Christmas can transition right into winter décor.  On my mantel you can see that I incorporated a lot of these elements for a soft, wintery look with lots of texture.


Use Candles and Your Fireplace

One of the best ways to make your home feel warm and inviting during the winter is with yummy candles and a fire in the fireplace.  These are great ways to create instant coziness, and not to mention, they put off the most wonderful, soft light.

DSC_0165.jpg

Use Wreaths

If you know me at all, you know that I love to decorate with wreaths year round.  For winter, I actually kept some of the same wreaths that I used for Christmas but just switched out the red Christmas ribbon with a neutral ribbon.  A pine, birch, or cotton wreath would be perfect for winter.


Bring in Fresh Plants and Flowers

Winter can be a cold, gray, season of dormancy, so bringing in fresh flowers is a wonderful way to add some freshness and cheeriness and to help stave off those winter blues.  Hydrangeas are my favorite because, aside from being beautiful, they can last up to a month if properly cared for.

There you have it, friends.  I hope this has given you some great winter décor ideas that you can use as inspiration for your own home to fill it with coziness and warmth all season long!

XOXO

Jennifer

Tips for Creating an Inviting Guest Room

With Christmas just a couple of days away, if you're anything like me, then there will probably be a lot of cooking, cleaning, and getting the house ready for guests.  One space you definitely don't want to forget about as you're preparing your home is your guest bedroom.  Aside from making sure the sheets are clean, or that the bed even has sheets for that matter, it's easy to overlook this space because, unlike your guests, it's probably not a place where you spend a lot of time.  Today I just want to share with you some simple tips and ideas that you can use to make your guest bedroom a place where your guests actually want to hang out.  Most of these are super easy things that you can do today to cozy up your room and have it guest ready in no time!


Clean it Up & Make it Comfy

The very first thing I do when preparing my guest room for guests is make sure the bedroom is clean and free of clutter.  My guest room is on the small side, so I want to save as much room for my guests and their belongings as I can.  If you have time for it, try lying down in your guest room just to see if there are things that you notice that might not be the most comfortable for your guests.  Are the sheets soft enough?  Is the bedding warm enough?  Is the temperature of the room comfortable?  Is the lighting adequate?  I actually slept in our guest room one night just to get a good feel for what my guests would experience, and do you know what the worst thing about it was?  The ceiling fan!  It made a clicking, vibrating noise that drove me completely crazy!  I finally had to get up and turn it off.  I can only imagine that it would drive my guests crazy too!

To keep your guests comfortable, make sure that your bed has soft, cozy bedding.  You can also add a quilt or blanket at the foot of the bed just in case someone needs a little extra warmth.  An ottoman at the foot of the bed is a great place to store additional pillows and blankets.  It also serves as a nice place for guests to sit to get dressed or put on shoes.  Lamps on either side of the bed give extra light in case you have a guest who is a night owl but whose partner isn't.


Add Special, Welcoming Touches

There are lots of little things you can do to make your guests feel extra special, that don't take a lot of time or money.  In my guest room, I added a sweet little pillow to the bed that simply says, "Stay Awhile."  It's just a simple way of making my guests feel welcome and letting them know that they're free to make themselves at home. 

Another special touch I added was to print out our Wi-Fi information on pretty paper with a cute font.  I then framed it and put it on one of the nightstands so our guests have super easy access to it.  No more digging around in folders or checking the back of the router for the Wi-Fi password! 

DSC_0436.jpg

Because our guests are usually family members, I wanted to do something special for them by adding a personal touch to our guest room, so I started a gallery wall with photos of our loved ones from both sides of our family.  I'm always adding new photos, so this may be one huge gallery wall someday!  I just think it's a great way to show those you love how much they mean to you.  Oh, and kids love to see themselves in photos, so this has been extra special for my nieces.

Another thing I love to do to welcome my guests is to add a tray of fresh flowers and a yummy candle to my guest room.  In my opinion this is one of the quickest and easiest ways to brighten up a room, and to make it feel inviting.  If you do nothing else in your guest room (aside from adding clean sheets) do this!  Instant prettiness and freshness!

Because we're in the Christmas season, you know I'd love to add a full on Christmas tree to this room, but I just don't have the space, unfortunately.  Instead I just added a few simple Christmas touches to bring a in a little Christmas cheer.


Don't Forget the Bathroom!

You want the bathroom that your guests will be using to be comfortable and accessible just like the room they are sleeping in.  The first thing I always do is make sure the bathroom is clean.  Let's be honest, a dirty bathroom is definitely not welcoming.  One thing I love in my guest bath is white towels.  I just think it gives a hotel like feel, plus I like that they can be easily bleached if they happen to get stained.  If white isn't your thing, which I completely understand, I would just suggest that all of your towels match, no matter what color you choose.  It just makes your bathroom cabinet or linen closet look so much more put together and organized.  I also make sure my cabinet is well stocked with toilet paper.  You can never have too much toilet paper.  Finally, I like to add little jars of cotton balls and Q-Tips, which always come in handy, as well as a basket of darker colored wash cloths for make-up removal.  This will keep your whites from getting stained with makeup, which can be tricky to get out.  Just make sure you label your basket so your guests see them.

In addition to my linen cabinet, I also like to make sure my medicine cabinet is well stocked with items such as pain relievers, cold and allergy medications, and band-aids, as well as extra toothbrushes and toothpaste in case these types of items may have been forgotten by my guests.  I also keep the shower stocked with shampoo, conditioner, and body wash, and I keep a hair-dryer under the sink, as well as a basket for items that my guests may want to leave so they have them the next time they come to visit.

Outside of the door to the bathroom, I keep a basket where my guests can toss their towels when they're finished with them.  It makes it so much easier to collect all the towels and get them to the laundry room and back after your guests leave. 

Just as in the guest bedroom, I like to add a few special touches to the bathroom as well.  I always buy a petite bouquet of fresh flowers to leave on the bathroom counter for my guests to enjoy during their stay and to take with them when they leave.  It's my way of thanking them for coming, kind of like a party favor, if you will.  Since it's Christmastime, I chose a small potted poinsettia. 

The other thing I like to have in the bathroom for my guests is a basket of goodies.  I have a tiered basket on the countertop that I fill with special soaps and lotions, super soft hand towels, a pretty linen guest towel, a cute little ceramic bird, and best of all chocolates.  Come on, who doesn't like to nibble on a little chocolate while they're shaving or flat ironing their hair?


Well, friends, that's it!  I hope this helps you get those guest bedrooms in comfy, cozy, inviting order for all of your holiday guests!  Do you have something special that you like to add to your guest room to get it ready for guests?  I'd love to hear about it!  Leave me a comment below!  Have a merry Christmas and a blessed New Year!

XOXO
Jennifer

Winter Wonderland Tablescape

Merry Christmas, friends!  Can you believe that we're less than two weeks away from the big day?!  I have to say that one of my favorite things about the holidays is sharing special meals around the table with family and friends.  Since we're hosting Christmas this year, I wanted to create a beautiful tablescape to enjoy our Christmas dinners around.  I live in Houston, and we definitely don't get wintery weather too often, so I loved the idea of creating a winter wonderland tablescape to bring a sparkly, icy touch to my Christmas décor.

To start, I laid down a white fur table runner and arranged a faux pine garland on top of it.  I then nestled trees of different textures and materials into the garland.  If you haven't discovered the tiny, battery-operated twinkling lights yet, you need to!  They're just so cool and add a little sparkle to nearly any spot you can think to use them.  I wrapped a strand of them around my trees and through my tablescape, and I just love how it lights everything up, especially at night!  Next I added in some sparkly little stags, as well as some silver, glittery ornaments and silver pinecones.  Finally I pulled in some mercury glass and birch candleholders.  In my opinion, every tablescape needs some candlelight.

For my place settings, I used my go to metallic woven chargers and layered snowflake placemats on top.  I then added my grandmother's China and cute little snowflake napkin rings.  I've said it before, but every time I create a tablescape in my dining room, I always like to use my grandmother's China.  I feel like it's just a special way to remember her.  I really hope you enjoy this little tour!


Thank you so much for following along!  I hope this inspires you to create your own beautiful winter wonderland tablescape!  Enjoy this Christmas season, friends!

XOXO

Jennifer

2016 Christmas Home Tour

Merry Christmas, friends!  I'm so glad you're here!  Can you believe that it's already that time of year again?!  I love Christmas; I love everything about it!  It's such a magical time!  I love the joy, the wonder, the anticipation, the baking, the decorating, the activities, the shopping, the gift-giving, and most of all celebrating the birth of our King!  One thing December always brings with it is lots of entertaining and lots of time spent sharing our homes with loved ones.  That being said, I had so much fun decking the halls and bringing some Christmas coziness to our home.  If you know anything about me, then you know I love neutrals, but I have to admit that I love a little red at Christmas time so I added in cheery little pops of it wherever I could.  I hope you enjoy this little tour!


Front Porch

I love decorating my front porch, and you can see how I've pulled in those pops of red with fresh poinsettias and red berries on my wreath and little Christmas trees.  I also added some wreaths with red bows to the light fixtures flanking the entrance to our porch.


Entryway

I love decorating our entryway!  I always have so much fun with it!  I went a little more cutesy and whimsical with our entry console this year, mainly for my daughter's sake.  She's at that magical age for Christmas!  She loves the Santa and the little snowmen sitting on the console.  Did anyone else find those little snowmen from Target simply irrestible this year?  This is also where my daughter's advent calendar is.  It's a row of stockings, one for each day, and everyday we move the little reindeer into the appropriate stocking.  In the evenings we read a little story from her Advent book, then she finds that either candy, a small toy, or a tiny nativity character has been added to that day's stocking.  Her nativity set will be complete on Christmas day with baby Jesus.  She is having so much fun with it this year! 

My entryway bench and coats hooks are quite possibly my favorite thing in our house to decorate.  Here I pulled in some fun Christmas pillows and a pretty berry wreath, all with pops of red.  My Roberts milk crate is filled with birch logs, pine greenery and berries, and an antler wreath for a natural touch


Living Room

I have to say that I'm so impressed by people who can manage more than one Christmas tree.  They're so much work!  My daughter actually has a white, girly tree upstairs near her playroom, but, thankfully it's pretty easy to put up.  Our main tree was definitely a labor of love this year, as nearly all the pre-lit lights were burned out.  Sigh.  I spent three long hours wrapping this tree with lights and another full day decorating it.  This is our main tree, our family tree, and it houses all of our special, personal ornaments, as well as the fancy decorative ones.  I'm so happy with how it turned out!  I love the neutral tree with the pops of red!  In the rest of the living room, I pulled a little more red in on the pillows, the throw, the décor, and the Christmas stockings on the fireplace.


Kitchen

I kept the Christmas décor to a minimum in our kitchen because it still has to be a functional space.  I simply styled my favorite tiered tray and vintage scale for Christmas, added some pretties to the vent hood, and some simple décor to the breakfast table.  Done and done.

Thank you so much for taking my Christmas tour, friends!  I hope you enjoyed it as much as I enjoyed sharing it!  Wishing you and yours a joyous Christmas and a blessed New Year!

XOXO

Jennifer

Autumn's in the Air Fall Home Tour

Happy fall, y'all!  I've teamed up with a group of wonderfully talented bloggers for the Autumn's in the Air Fall Home Tour, and we're going to share some amazing fall design inspiration with you!  If you're joining me from Kim and Lacey's blog, Styled With Lace, welcome!  I'm so happy you're here! Don't you just love fall?  It's quite possibly my favorite time of year!  I love the warm days and cool nights, the changing colors, pumpkin patches, fall festivals, football, and the fact that some of my favorite holidays are around the corner.  Fall is the perfect time to cozy up your home for the cooler months ahead.  Some of my favorite ways to do this are through the use of soft neutrals, cozy throws and pillows, plaids, yummy fall candles, and of course PUMPKINS! With that being said I'm going to show you how I've add fall touches to my own home, and at the end of this post you will find the blog links for the lovely ladies that I've teamed up with who are going to take you on a fall tour of their homes.  I hope you'll follow along!  You're sure to find some fabulous fall decorating ideas!


Front Porch

I love decorating my front porch for fall!  I usually pull out the traditional fall colors here, as the inside of my home stays pretty neutral, but this year I decided to bring those neutral colors outside with white, heirloom, and fairytale pumpkins, cream mums, and a pretty, neutral fall wreath.


Entryway

I've said it before, but my entryway is quite possibly my favorite spot in my home to change up for different seasons.  Since this is where guests are welcomed into my home, I definitely want it to look inviting.  To cozy this space up for fall, I added lots of soft, neutral pillows, a pretty fall wreath, and my Roberts milk crate with my favorite white pumpkins and some birch logs. Adding natural elements to your decor is a great way to bring fall into you home!


Kitchen

I added very simple fall touches to my kitchen, including the magnolia wreath on my vent hood and a small vignette near my cooktop in which I incorporated my vintage scale with a pair of cream ceramic pumpkins and a cute little sage bush. 

My tiered tray is pretty much a staple on my island, and I love to restyle it for different seasons. For fall, I added some natural elements like wood, greenery, and baby boo pumpkins to give it an earthy feel.


Living Room

I cozied up my living room by pulling in plaid and knit pillows and cozy throws.  I added a reclaimed wood tray to my coffee table with cream lanterns and a wooden pumpkin.  My mantel I decorated very simply with a birch wreath, my favorite "thankful" sign, and some white pumpkins.  

Well, there you have it, friends!  Thank you so much for taking my fall home tour! Now be sure to hop over to Becca's blog, Adventures in Decorating, as well as all of these wonderful blogs listed below.  You're sure to find LOTS more beautiful fall decor ideas!

Sheila ~ Maison de Cinq

Becky ~ Buckets of Burlap

Laura ~ Junque Cottage

Sarah ~ Little Vintage Nest

Summer ~ She Leaves a Little Sparkle

Kelley Nan ~ Kelley Nan

Janet ~ Shabby Fufu

Kim & Lacey ~ Styled With Lace

Courtney ~ The Hamby Home

Shannon ~ Fox Hollow Cottage


XOXO

Jennifer

Creating an Elegant Fall Tablescape

Happy Fall, friends!  It's officially here!  Even though it may not feel like it here in Texas, I just couldn't wait any longer to get my hands on some pumpkins and to pull the fall bins out of the attic.  It's okay that it's 100 degrees outside and I have pumpkins everywhere, right?  Yep, because the calendar finally says so.  I love decorating for fall almost as much as I love decorating for Christmas, maybe even more so because it isn't as enormous of an undertaking, and I can pretty much get it done in a day. One of my very favorite ways to pull fall touches into my home is through tablescapes, so in order to kick off the fall decorating, I just want to share with you this earthy, elegant fall tablescape that I created for our dining room.  While it may look a bit complicated, it was really, REALLY simple!  

I picked up some heirloom, fairytale, and white pumpkins at a local nursery.  I love these types of pumpkins because they're so unique and beautiful, and I love their neutral tones. I also picked up a faux birch wood garland at the nursery in their home decor shop.  To start out, I laid down my burlap table runner, then I arranged my larger pumpkins, putting the middle fairytale pumpkin on a small wooden pedestal to elevate it.  Next I wove the garland around the large pumpkins and filled in with the smaller pumpkins, then I added in some faux eucalyptus, faux cream hydrangeas, and pine cones. I also pulled in my cute little laurel wreaths that I purchased during my recent trip to the Silos.  When it comes to placing your items and filling in, the key is simply to create balance.  To finish it off I added some brass candlesticks and some cream candles for a touch of shine and elegance. 

For my simple place settings, I used a metallic woven charger and placed my cute leaf place mats on top, then I added my grandmother's China.  I always love the beautiful seasonal plates that the stores sell, but anytime I create a tablescape in my dining room I always use my grandmother's China.  It's special to me, and I feel like it's a nice way to honor and remember her.


So there you have it!  Easy peasy!  I hope this inspires you to create some fall beauty in your own home.  It's such a lovely, cozy time of year.  Take advantage of it!


A few sources:

Pumpkins ~ Corneilus Nursery and Houston Garden Center    

Faux birch garland ~ Corneilus Nursery

Burlap table runner ~ Hobby Lobby                                              

Wooden pedestal ~ HomeGoods

Faux eucalyptus ~ Pier 1

Faux hydrangea stems ~ Pier 1

Gold metal pillar candle holders ~ Pier 1

Gold metal taper candle holders ~ Pier 1

Laurel wreaths ~ Magnolia Market

Woven chargers ~ Pier 1

Leaf place mats ~ Pier 1


XOXO

Jennifer

10 Tips For Lightening and Brightening Your Home

Hi friends, and welcome!  Today I'm so excited to be part of a summer blogger tour with a talented group of designers, and we're going to share with you our favorite tips for brightening our homes!  Whether you're one of my regular readers or you're coming from sweet Janine's blog, The Happy Happy Nester, I'm so glad you're here!  Have you ever flipped through a glossy home decor magazine or scrolled through Pinterest or Instagram and wished you could get your home to look as light and bright as what you see in the photos? If you're anything like me and love a light, cheerful home, then these tips for brightening up your space are just for you!  Even if you have a dark room you can apply these tips to instantly brighten up your space and make it delightfully Instagram ready...

Read more

From Transitional to Cottage Style With Chalk Paint

I received this chest of drawers from a client who I was working with to turn a second upstairs master suite into a combination guest room and nursery for her new baby girl.  She was going for a sweet cottage look with soft bedding and cream furniture, but there was one problem; the dark, sleek, cherry-colored chest of drawers that she had in the room (which she wanted to try to keep) just wasn't jiving with the look we were trying to accomplish.  The solution, chalk paint...

Read more

My Favorite Summer Gift Ideas + A Giveaway!

I don't know about you, but early summer is a busy time at our house.  With the school year ending, birthdays, and anniversaries there's a lot going on.  Not to mention that this time of year also includes graduations, weddings, Father's Day, and is also a popular time of year to move to a new home before the next school year starts.  So what do all these occasions have in common?  A great gift is the perfect way to celebrate all of them...

Read more

Styling a Tiered Tray for Every Season

I wrote in my white vase challenge post several weeks ago about there being certain pieces of home decor that I would consider to be staples.  I mentioned how the white vase would be one of those items. Well, the tiered tray would be another that is absolutely at the TOP of my list.  Tiered trays are one of the most versatile home decor pieces that I can think of.  They come in so many shapes, sizes, and finishes that you're sure to find one that fits your design style and budget...

Read more

Styling Built-Ins

I get a lot of questions on my Instagram feed about how to style built-ins. They are such a great architectural feature to have in a home!  I have to admit that when I walk into a house that has built-ins, I get pretty excited about it.  They are great for adding interest and coziness to a space...

Read more

White Vase Challenge

Just as we all have staple pieces in our closets, there are items that I would consider to be home decor staples, and the white vase would have to be at the top of my list.  I can't think of a piece that is more versatile and timeless than the classic white vase.  The beauty of it really is in its simplicity.  It allows whatever you choose to style it with to be the star of the show.  I recently teamed up with 15 other amazingly talented designers in an Instagram loop called the "White Vase Challenge." 

Read more

Spring Has Sprung Home Tour

I've teamed up with some incredibly talented ladies for a blog loop to share a little spring design inspiration!  If you're joining me from another blog tour, welcome!  I'm so happy you're here!  Don't you just love spring?  The sunshine, the spring rain, the blooming flowers, Easter...I love all of these things, but I have to say that most of all I love the new life it brings, the new beginnings. Spring is a great time to bring new life into your home as well, to lighten up and freshen up...

Read more